- NeRFを使えば,点群・メッシュ・任意視点動画が作れるのでやってみた
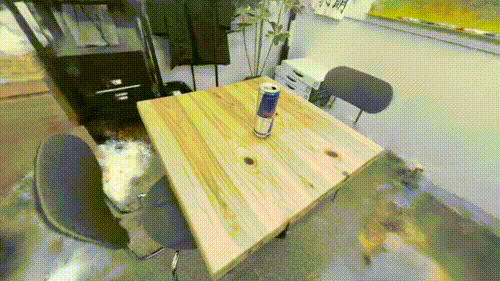
- 今回は愛飲するRedBullを被写体にしてみるヨ!
- 任意視点動画 (GIF版)
- 任意視点動画 (動画版)
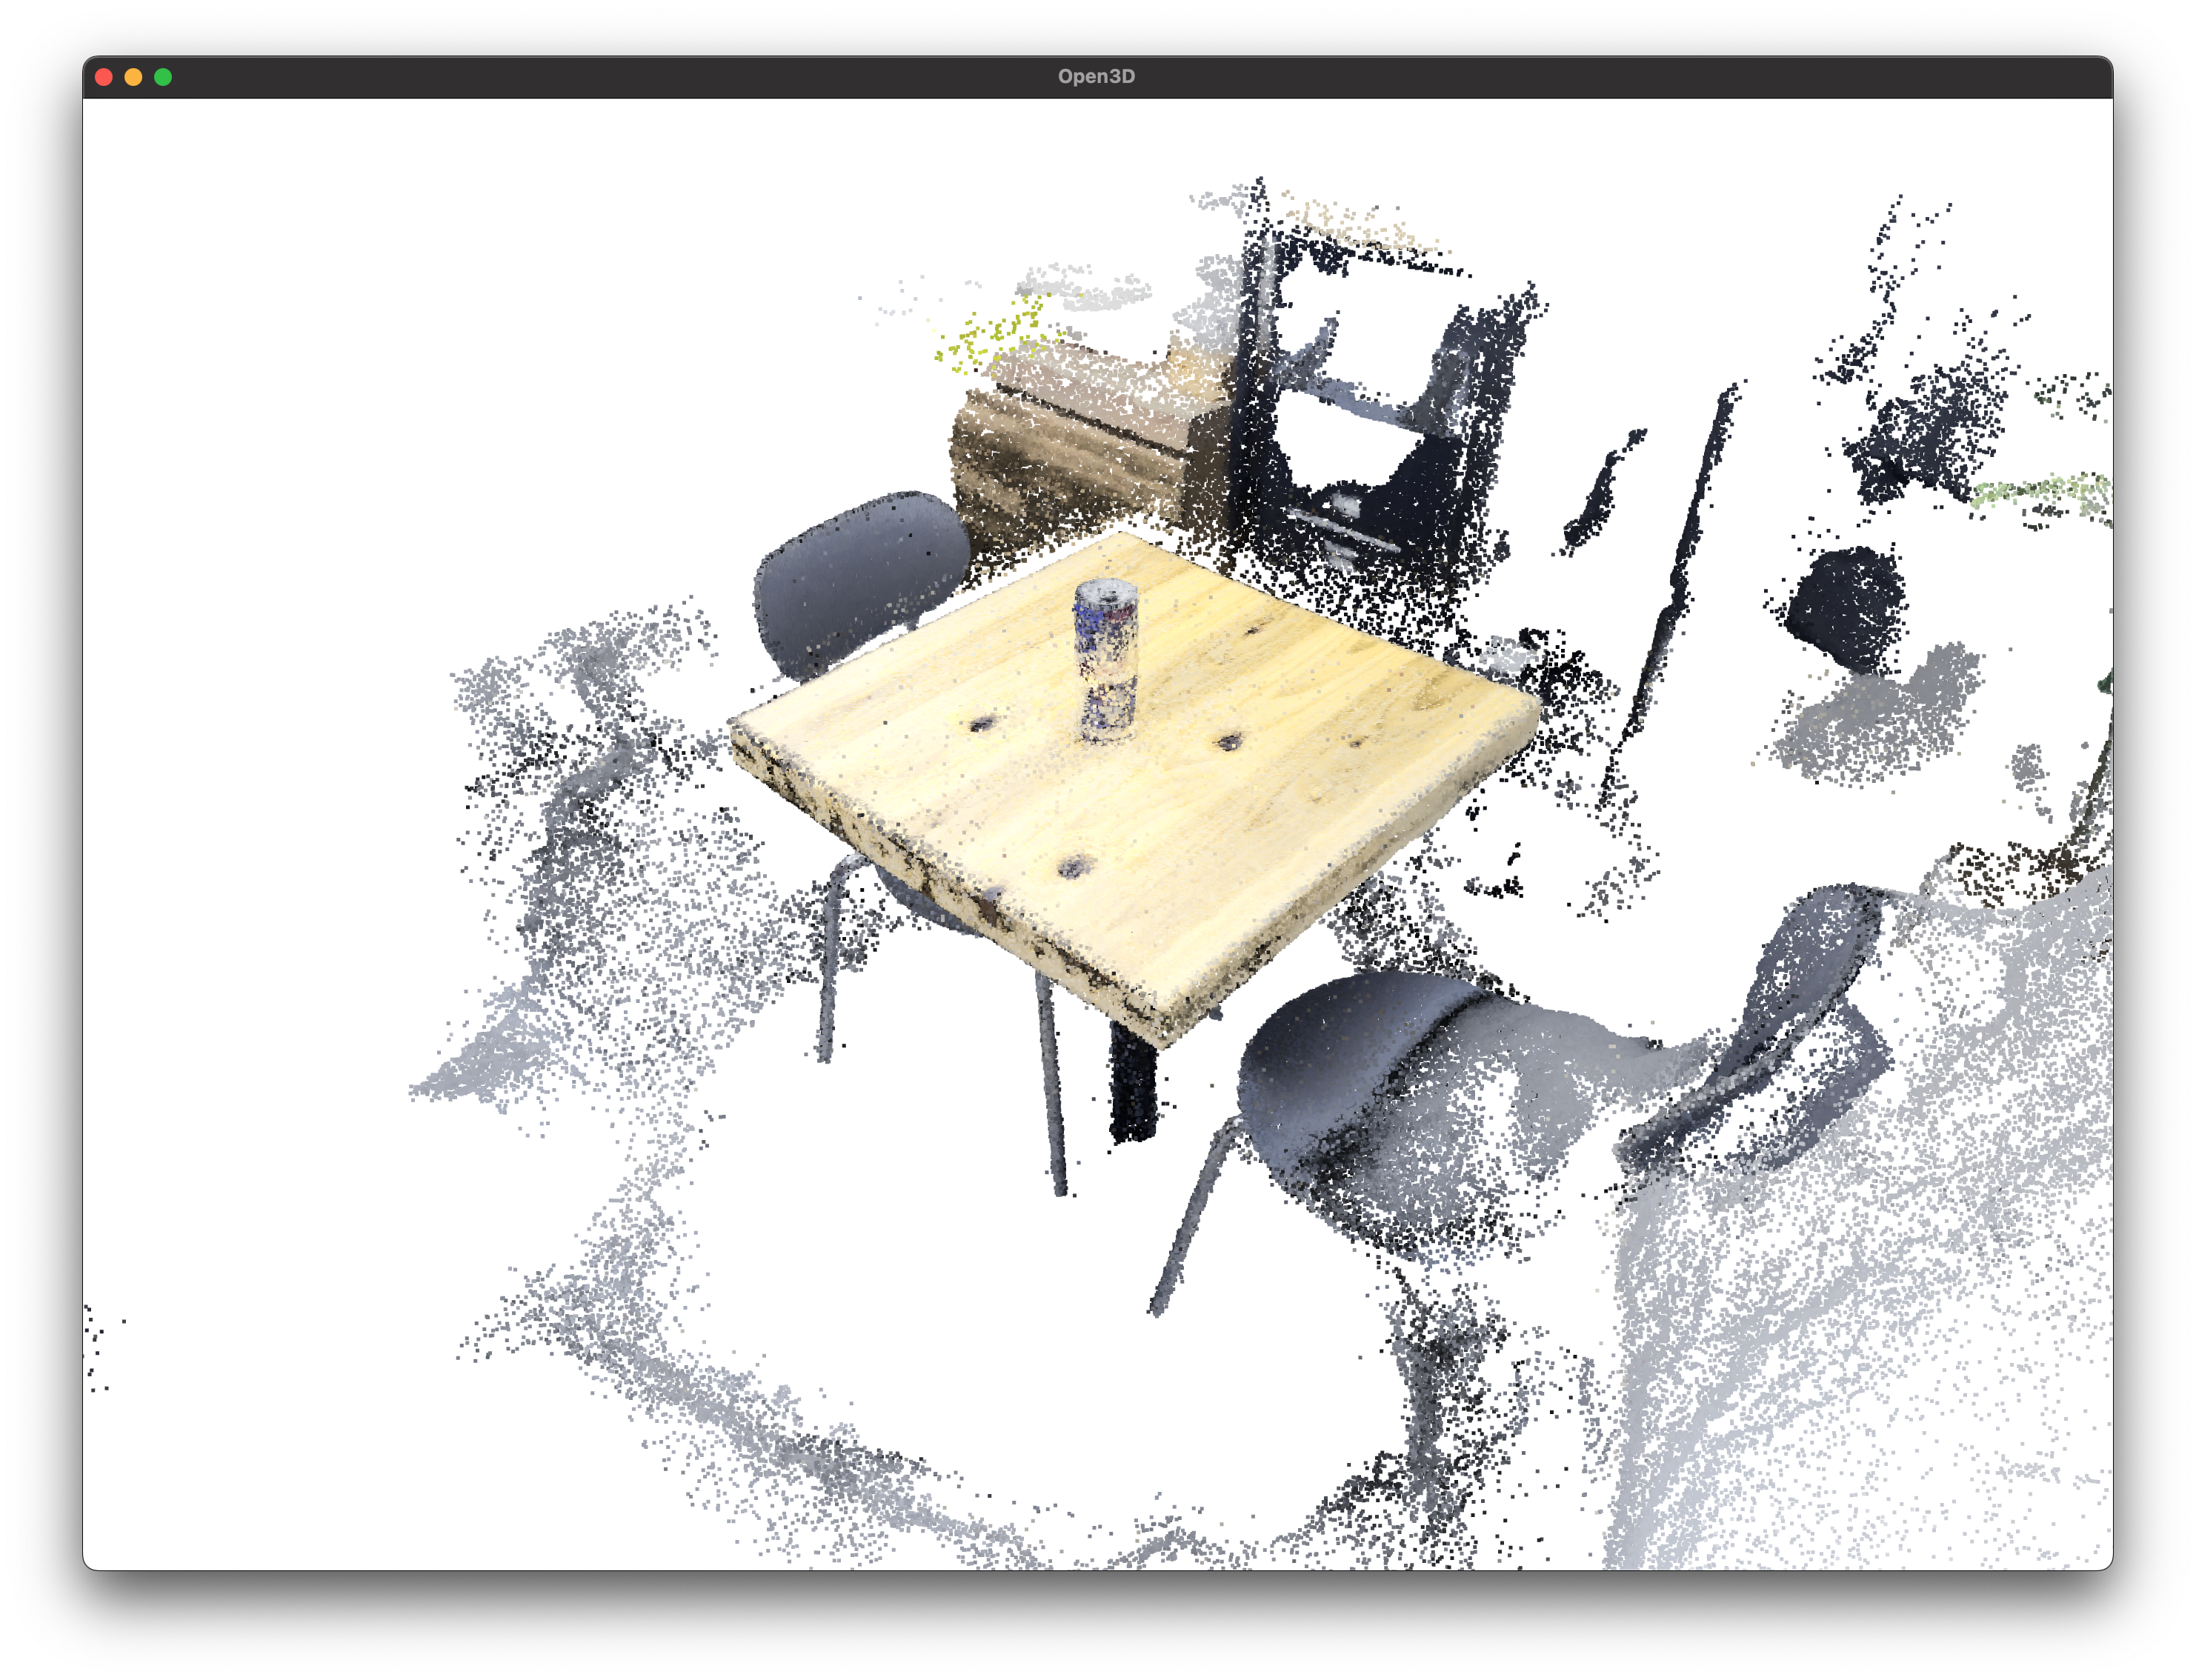
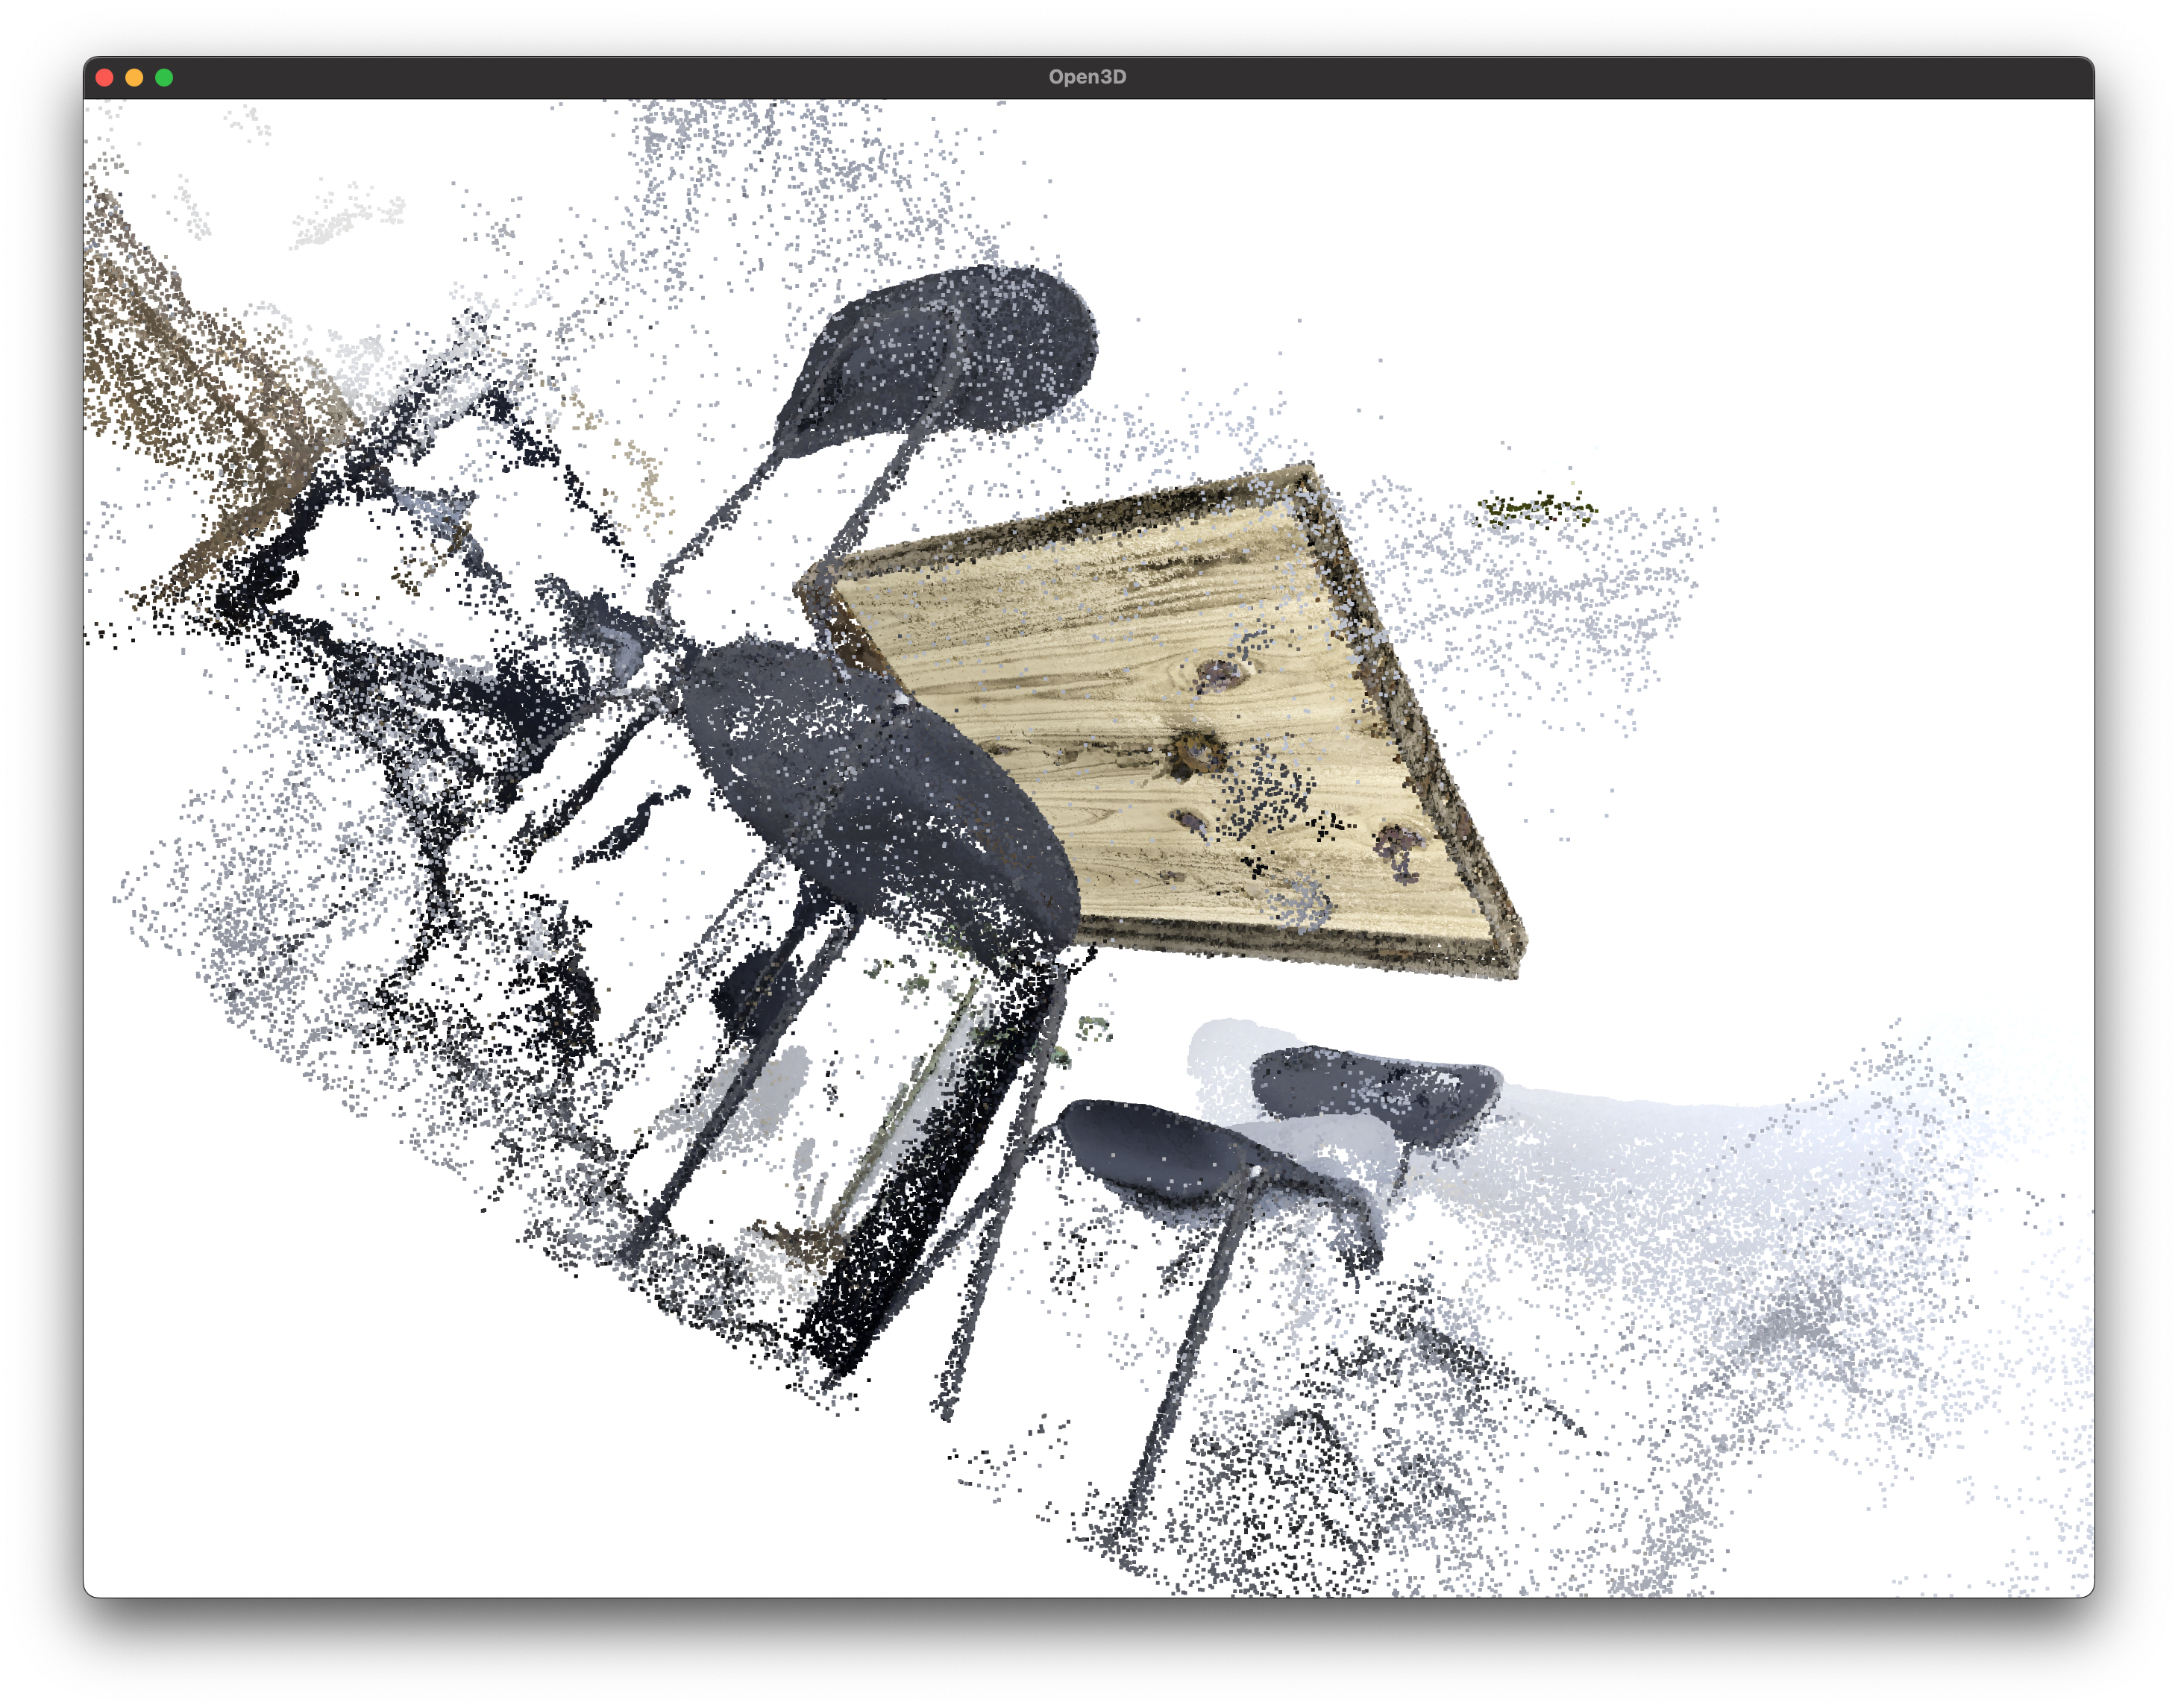
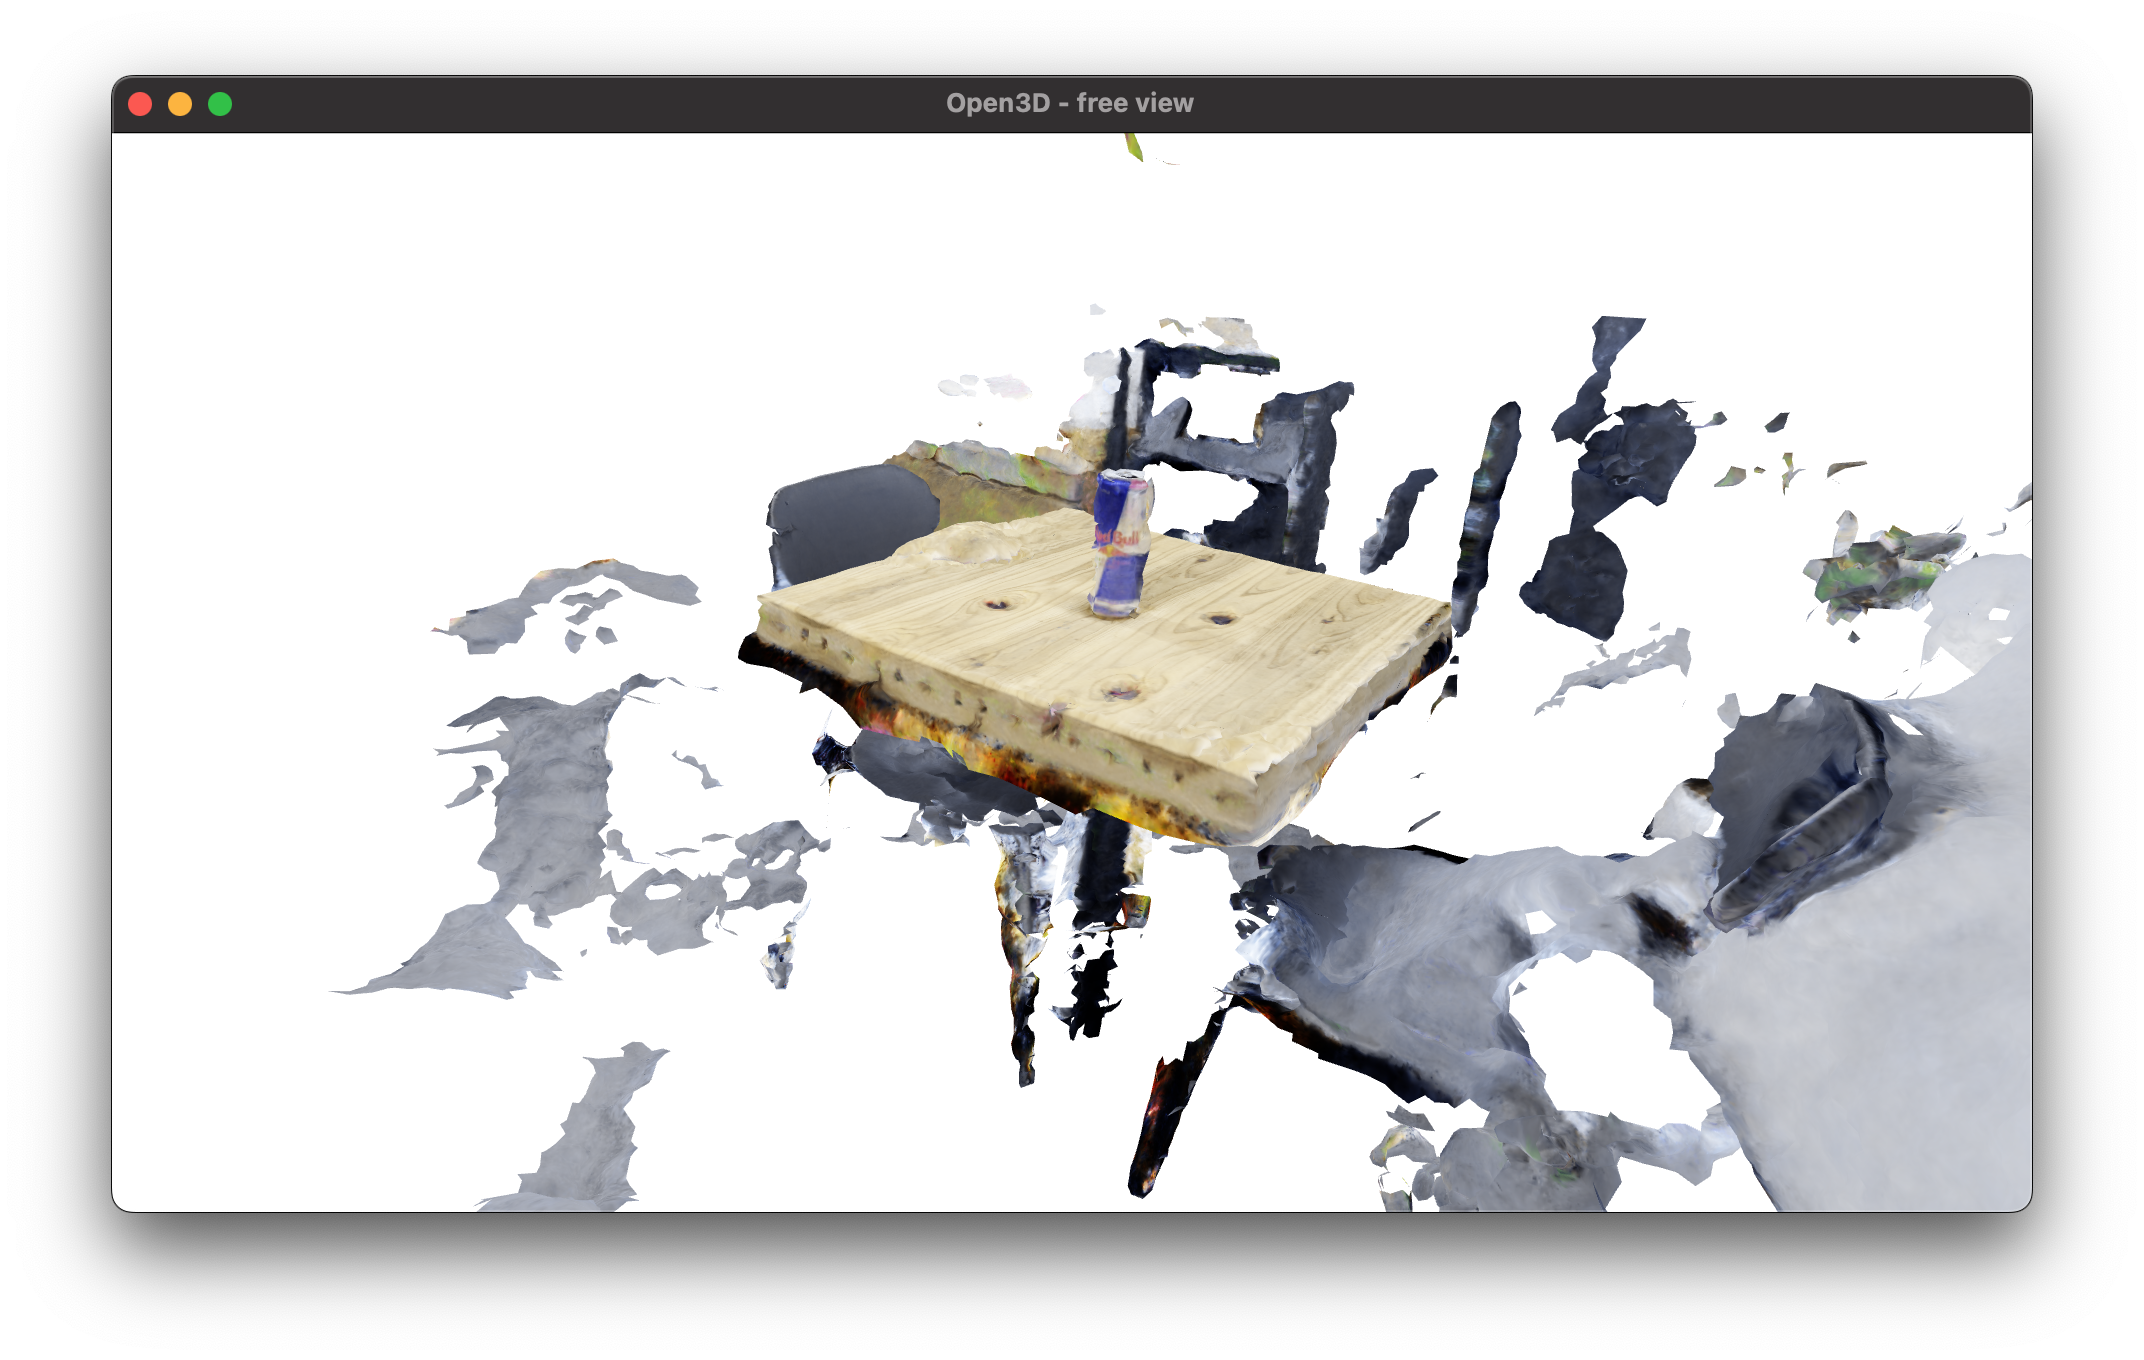
- 点群
NeRFとnerfstudioについて簡潔に説明
- ボリュームレンダリング
- ある点 $x$と方向 $d$を入力として $(c,\sigma)$を出力する行為.
- $c,\sigma$はそれぞれ色と密度を指す.
- NeRF
- 「学習」という言葉の注意点
- ボリュームレンダリングを行う $F_\theta(x,d)$を学習するため,一つの物体専用のモデルを作るイメージ
- したがって,pretrainという概念も,別物体に対する汎化という概念も存在しない
- ボリュームレンダリングを行う $F_\theta(x,d)$を学習するため,一つの物体専用のモデルを作るイメージ
We optimize a separate neural continuous volume representation network for each scene. This requires only a dataset of captured RGB images of the scene, the corresponding camera poses and intrinsic parameters, and scene bounds (we use ground truth camera poses, intrinsics, and bounds for synthetic data, and use the COLMAP structure-from-motion package to estimate these parameters for real data).
引用: NeRF: Representing Scenes as Neural Radiance Fields for View Synthesis
- nerfstudio
- あらゆるNeRF系論文を統一的に実装できるようなフレームワーク
- 論文もある (SIGGRAPH 2023)
- Nerfstudio: A Modular Framework for Neural Radiance Field Development
実験環境
- テスト環境
- GCP V100
- CUDA 11.8
nerfstudio == 0.3.4pycolmap == 0.4.0hloc == 1.4
前準備: COLMAPをインストール
- nerfstudioのDockerfileを使えばこの辺りは不要.
- 筆者はDockerを使わずに使いたかったので,この手順を踏んだ
|
|
|
|
前準備: nerfstudioをインストール
|
|
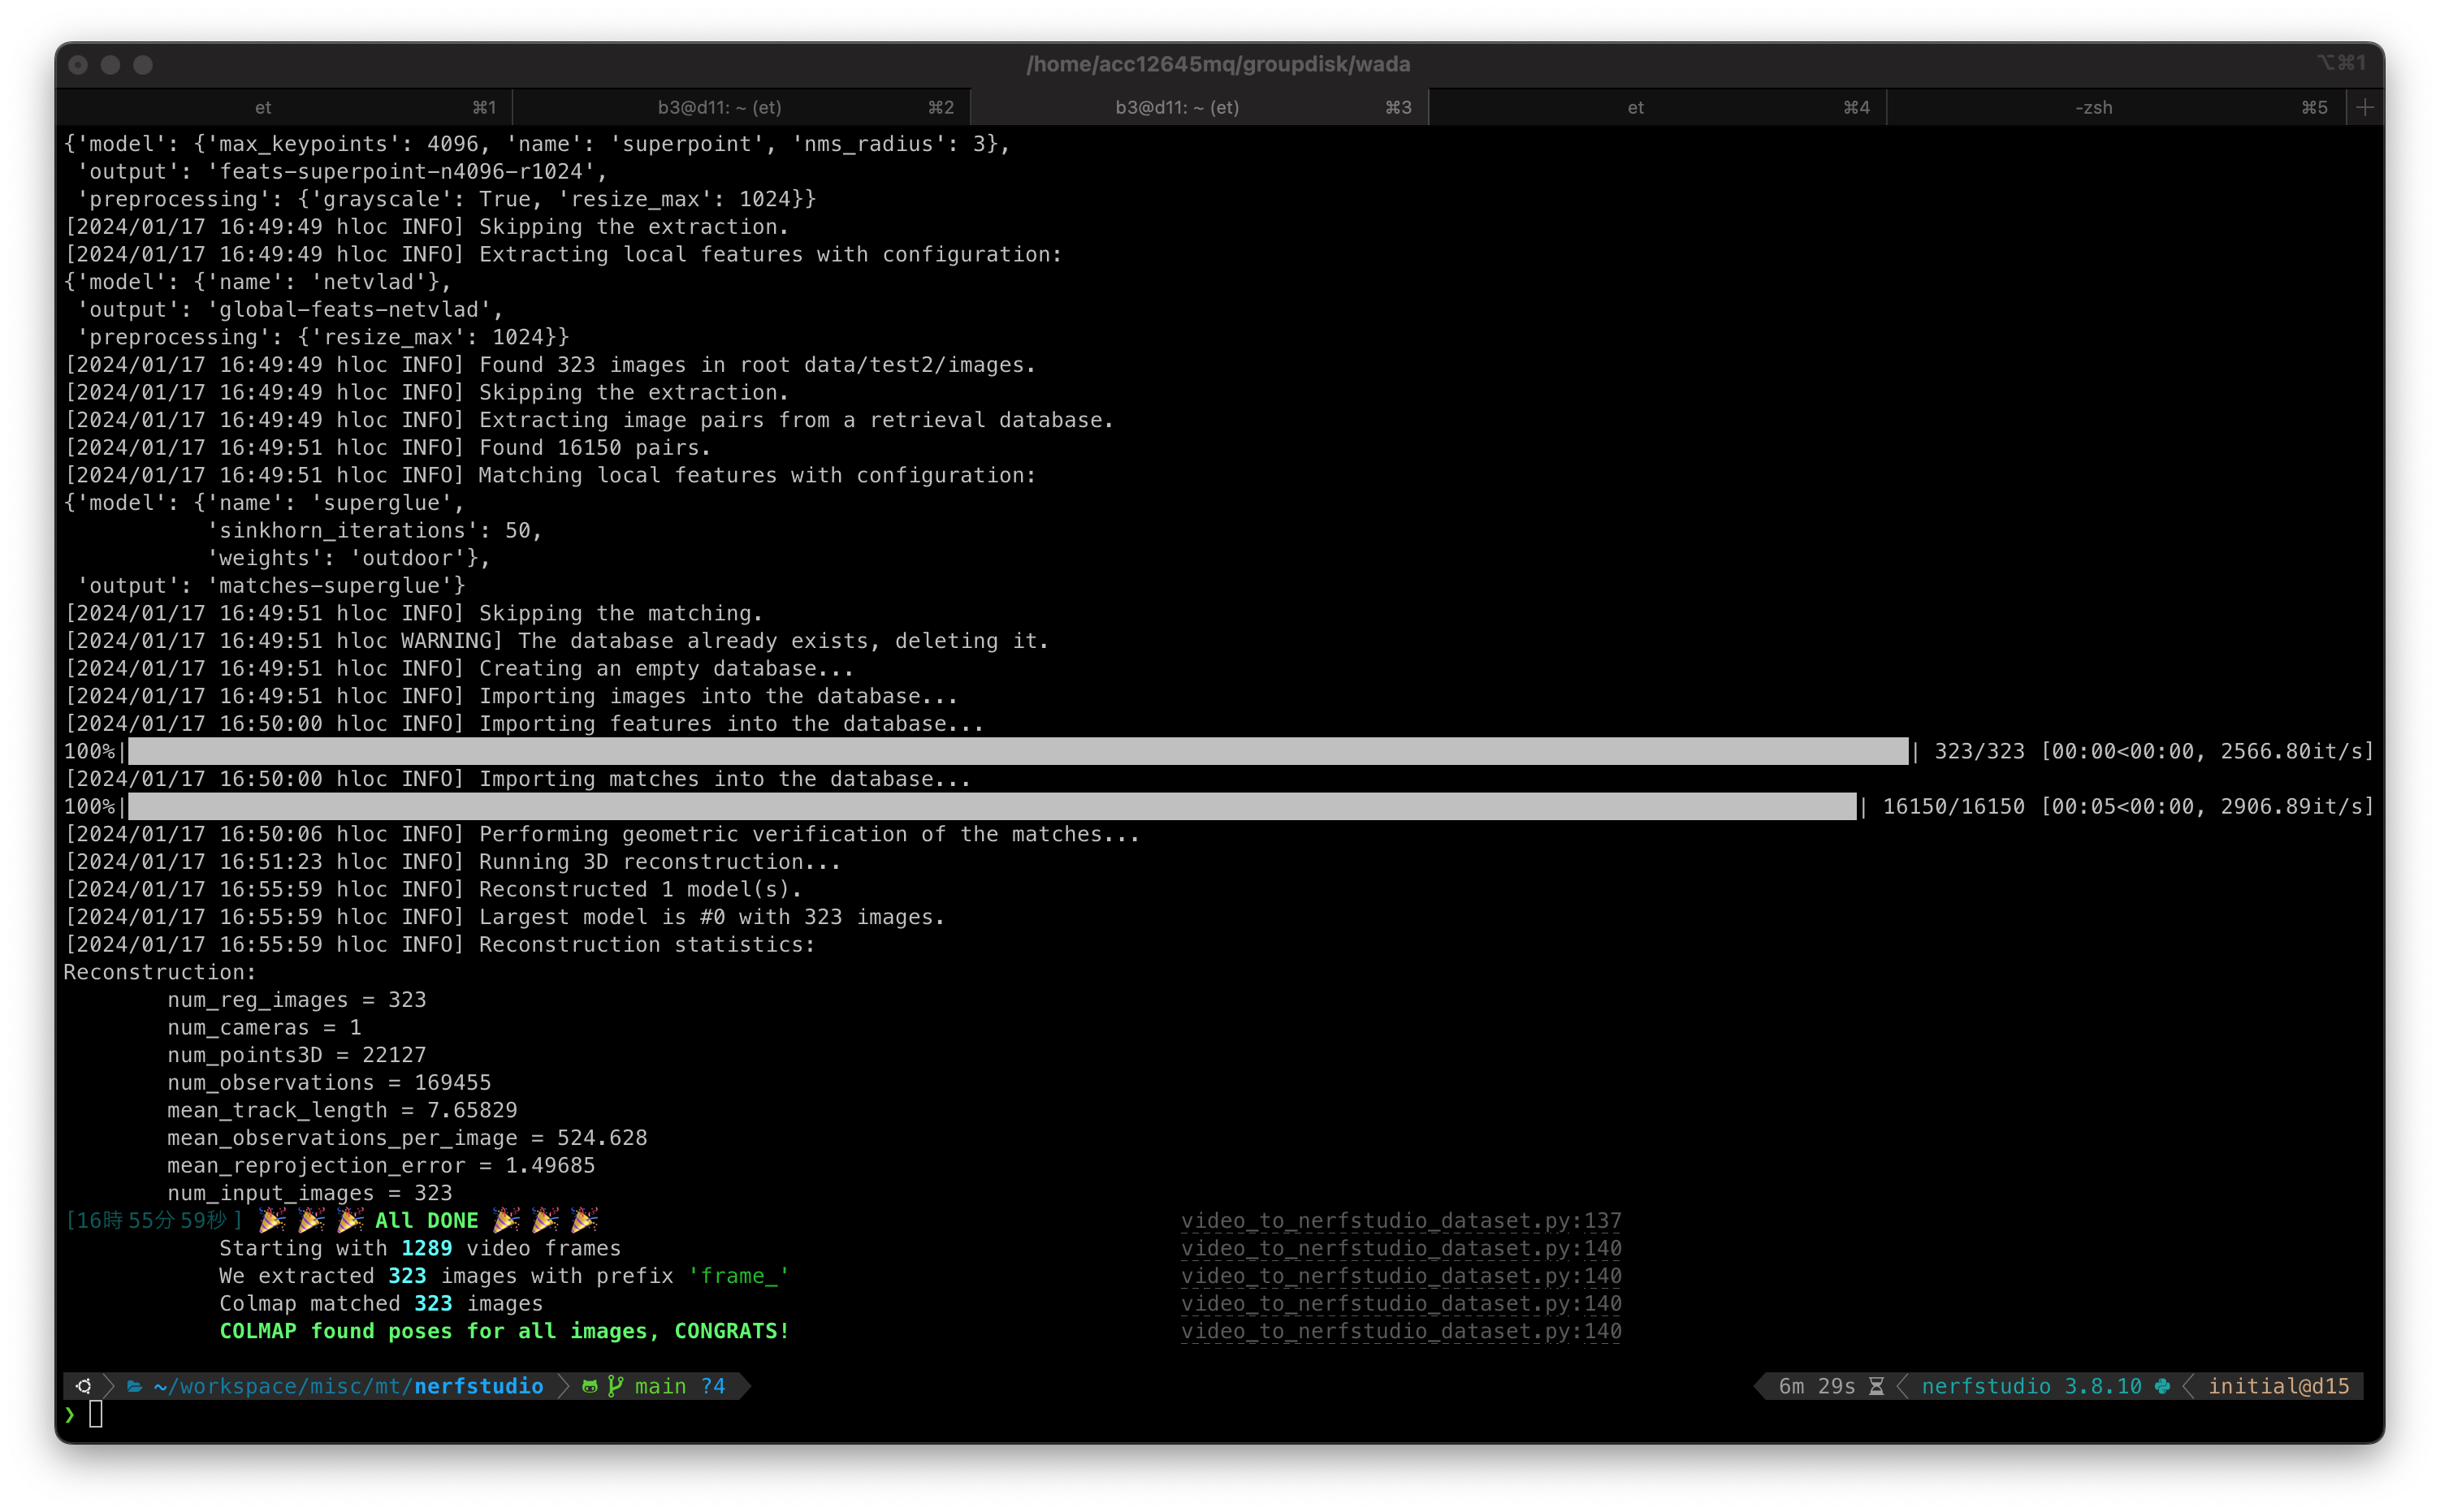
step1: 動画からSfMを実行
|
|

- 以下のように失敗する場合,COLMAPの性能限界が原因であることが多いので,
hlocを使う- ただし,以下のvesionを使うこと
pycolmap == 0.4.0hloc == 1.4
- ただし,以下のvesionを使うこと

step2: NeRFによりSfMから3Dモデルを構築
- SfMからNeRFを学習させる
|
|
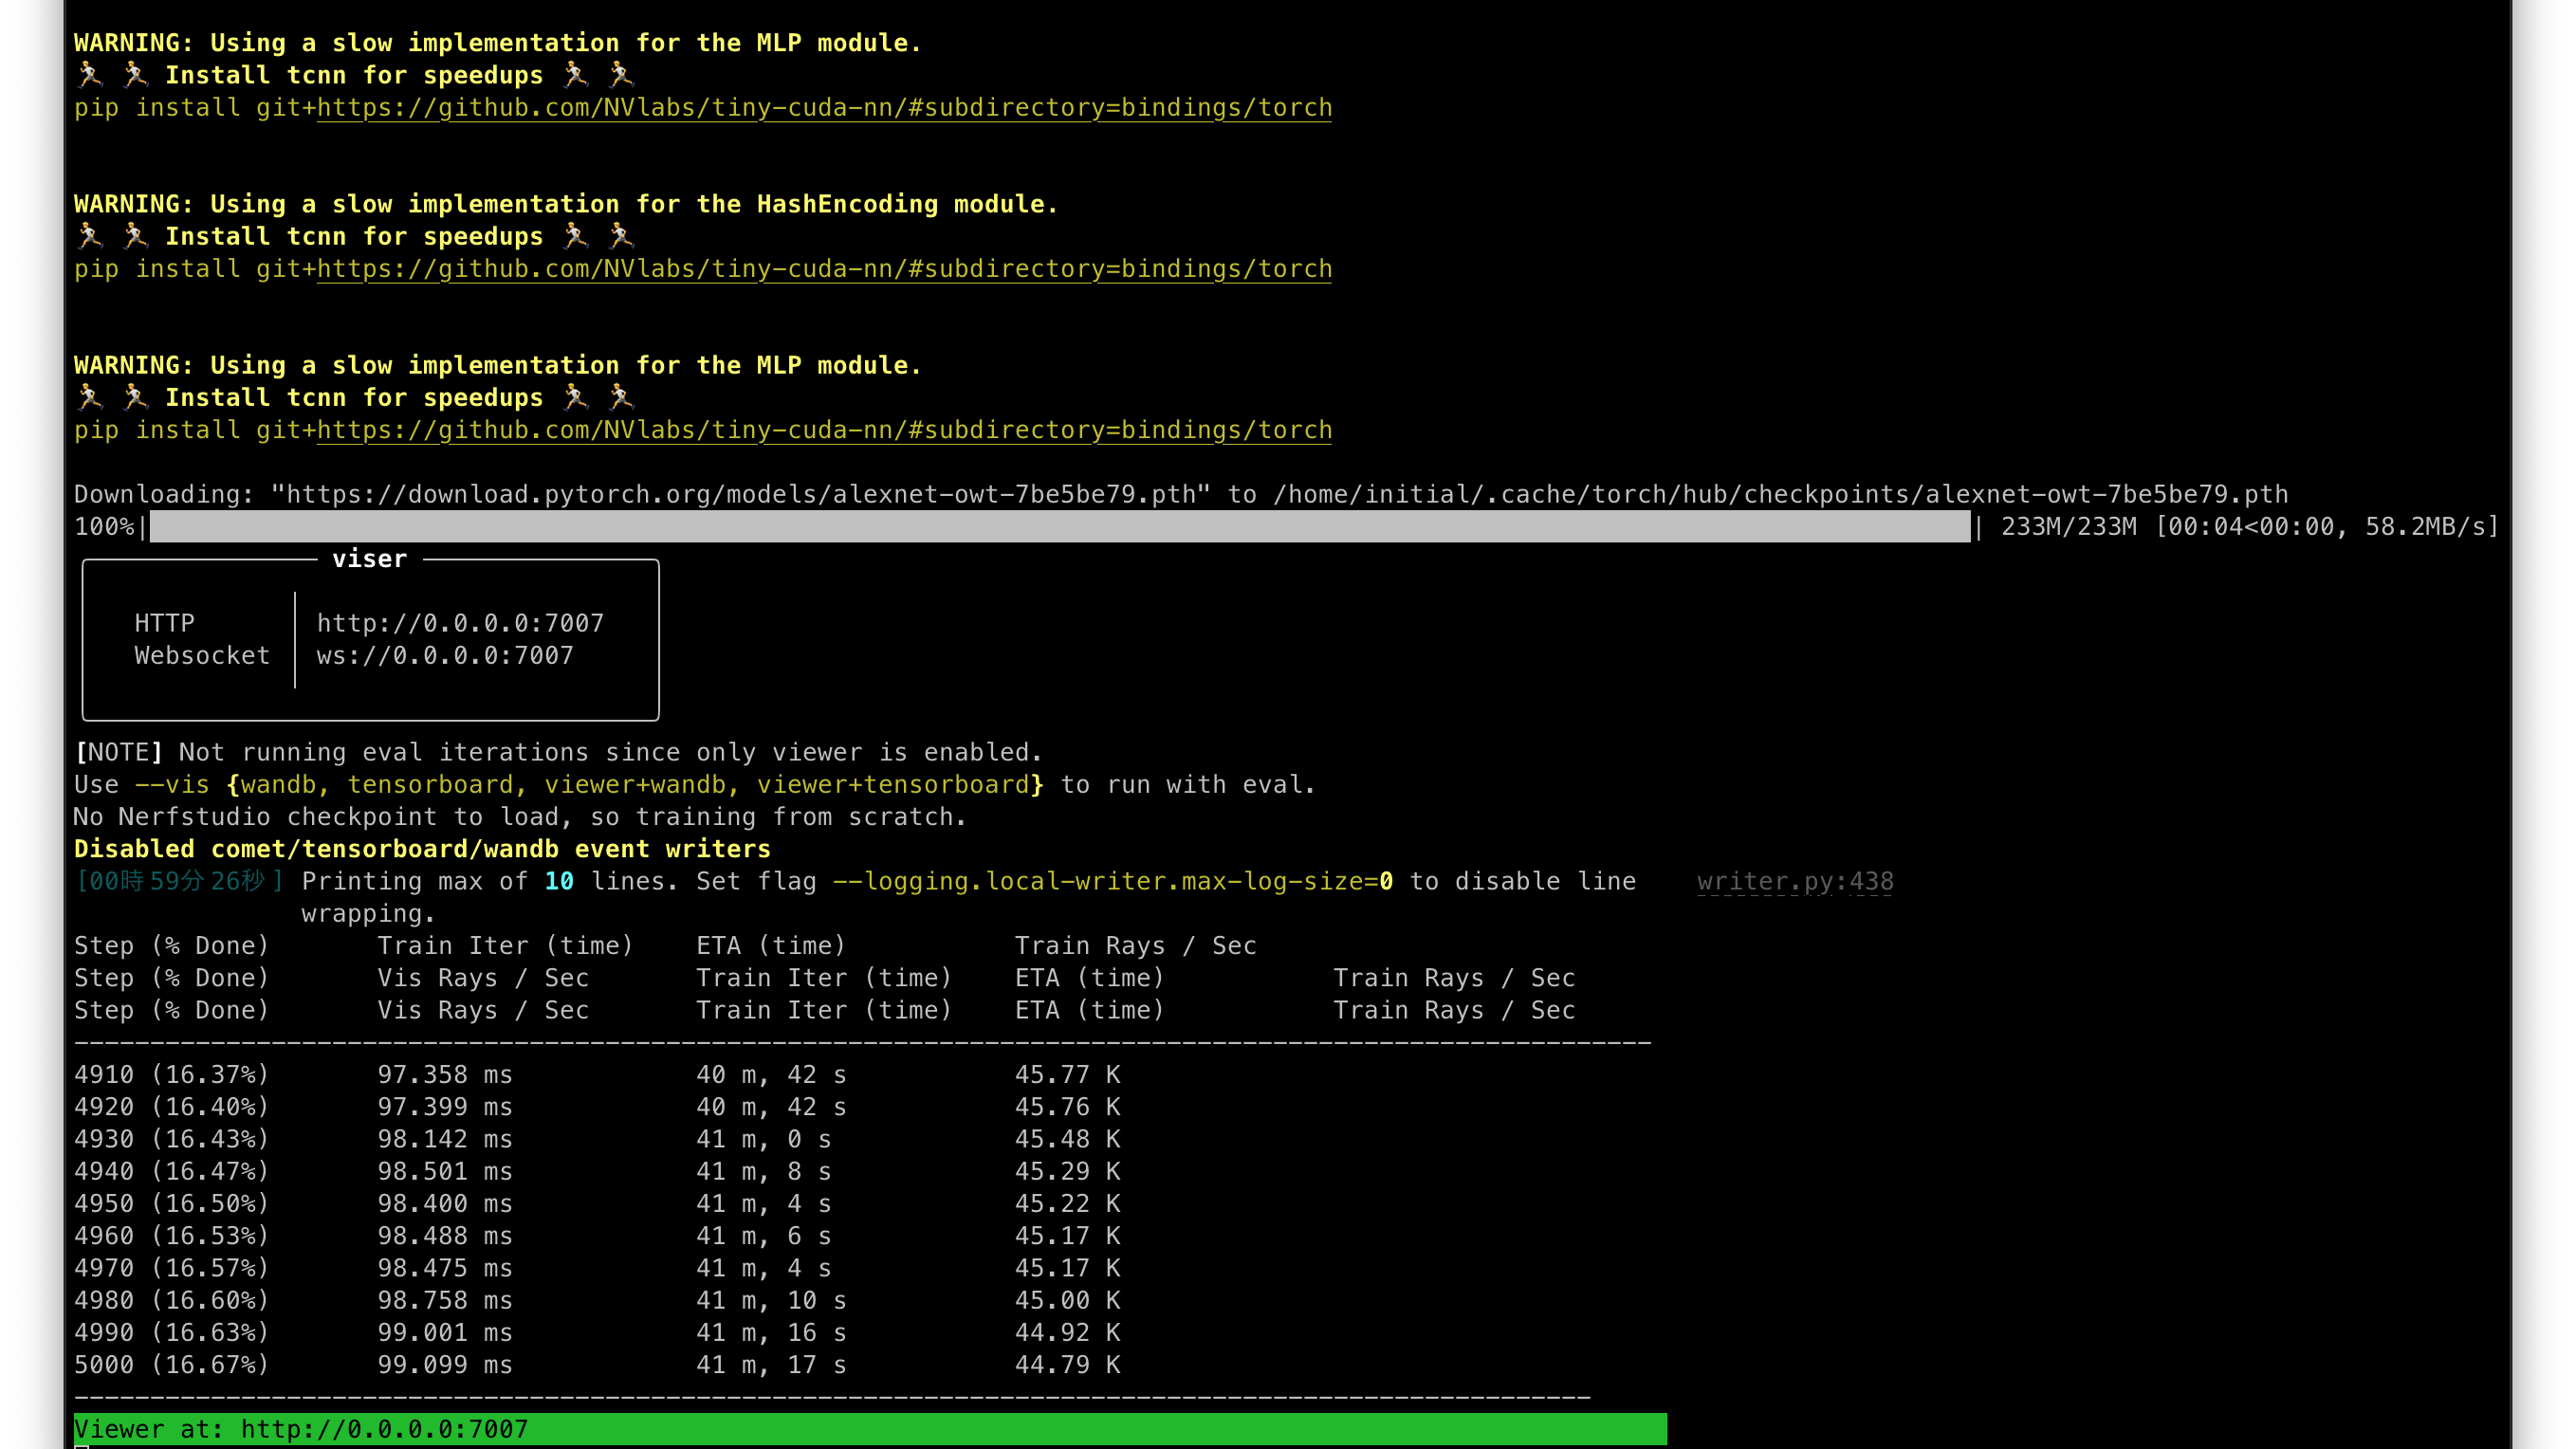
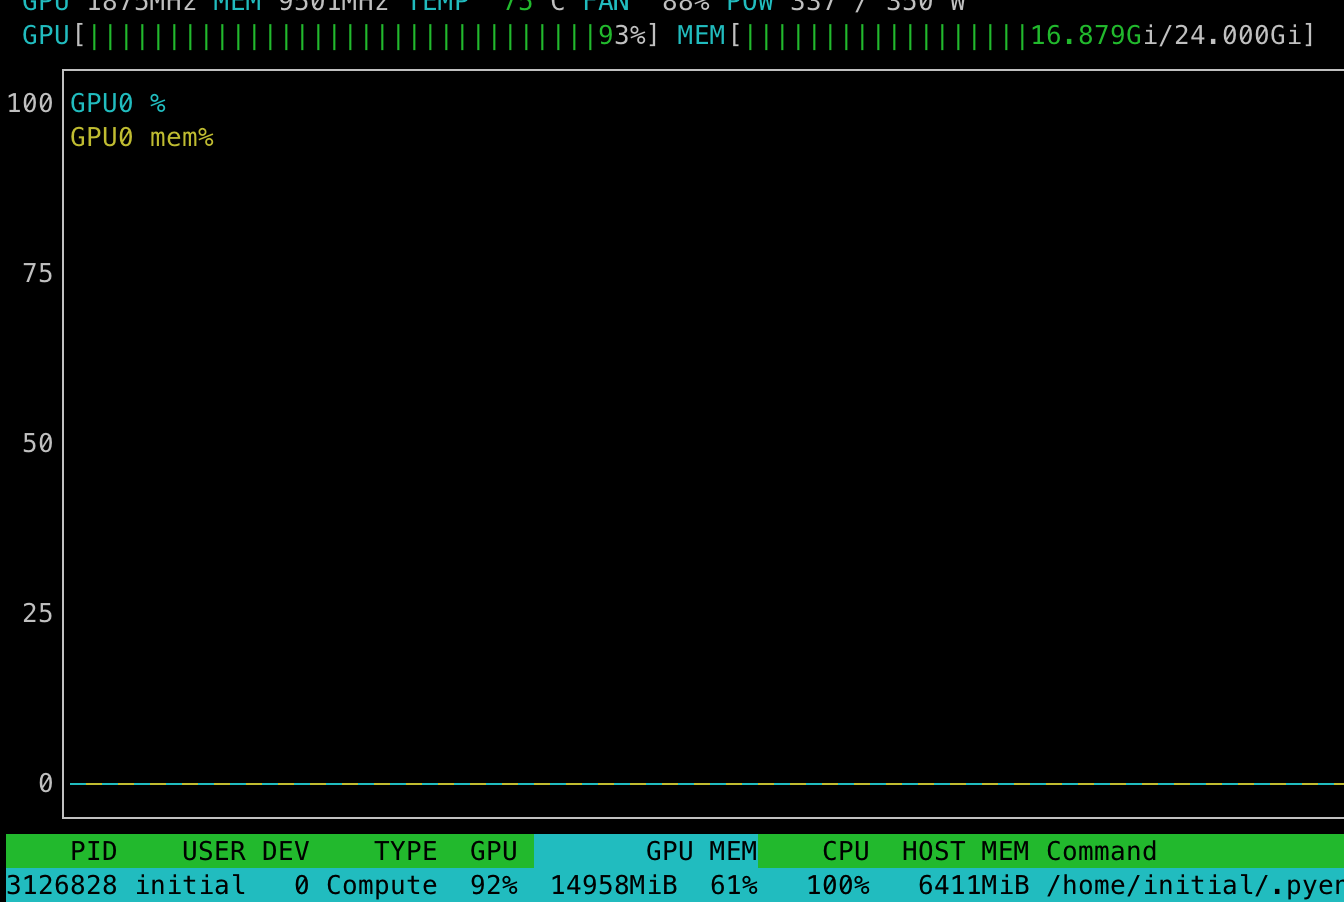
- VRAM使用量はコレくらい (約17GB / 24GB)
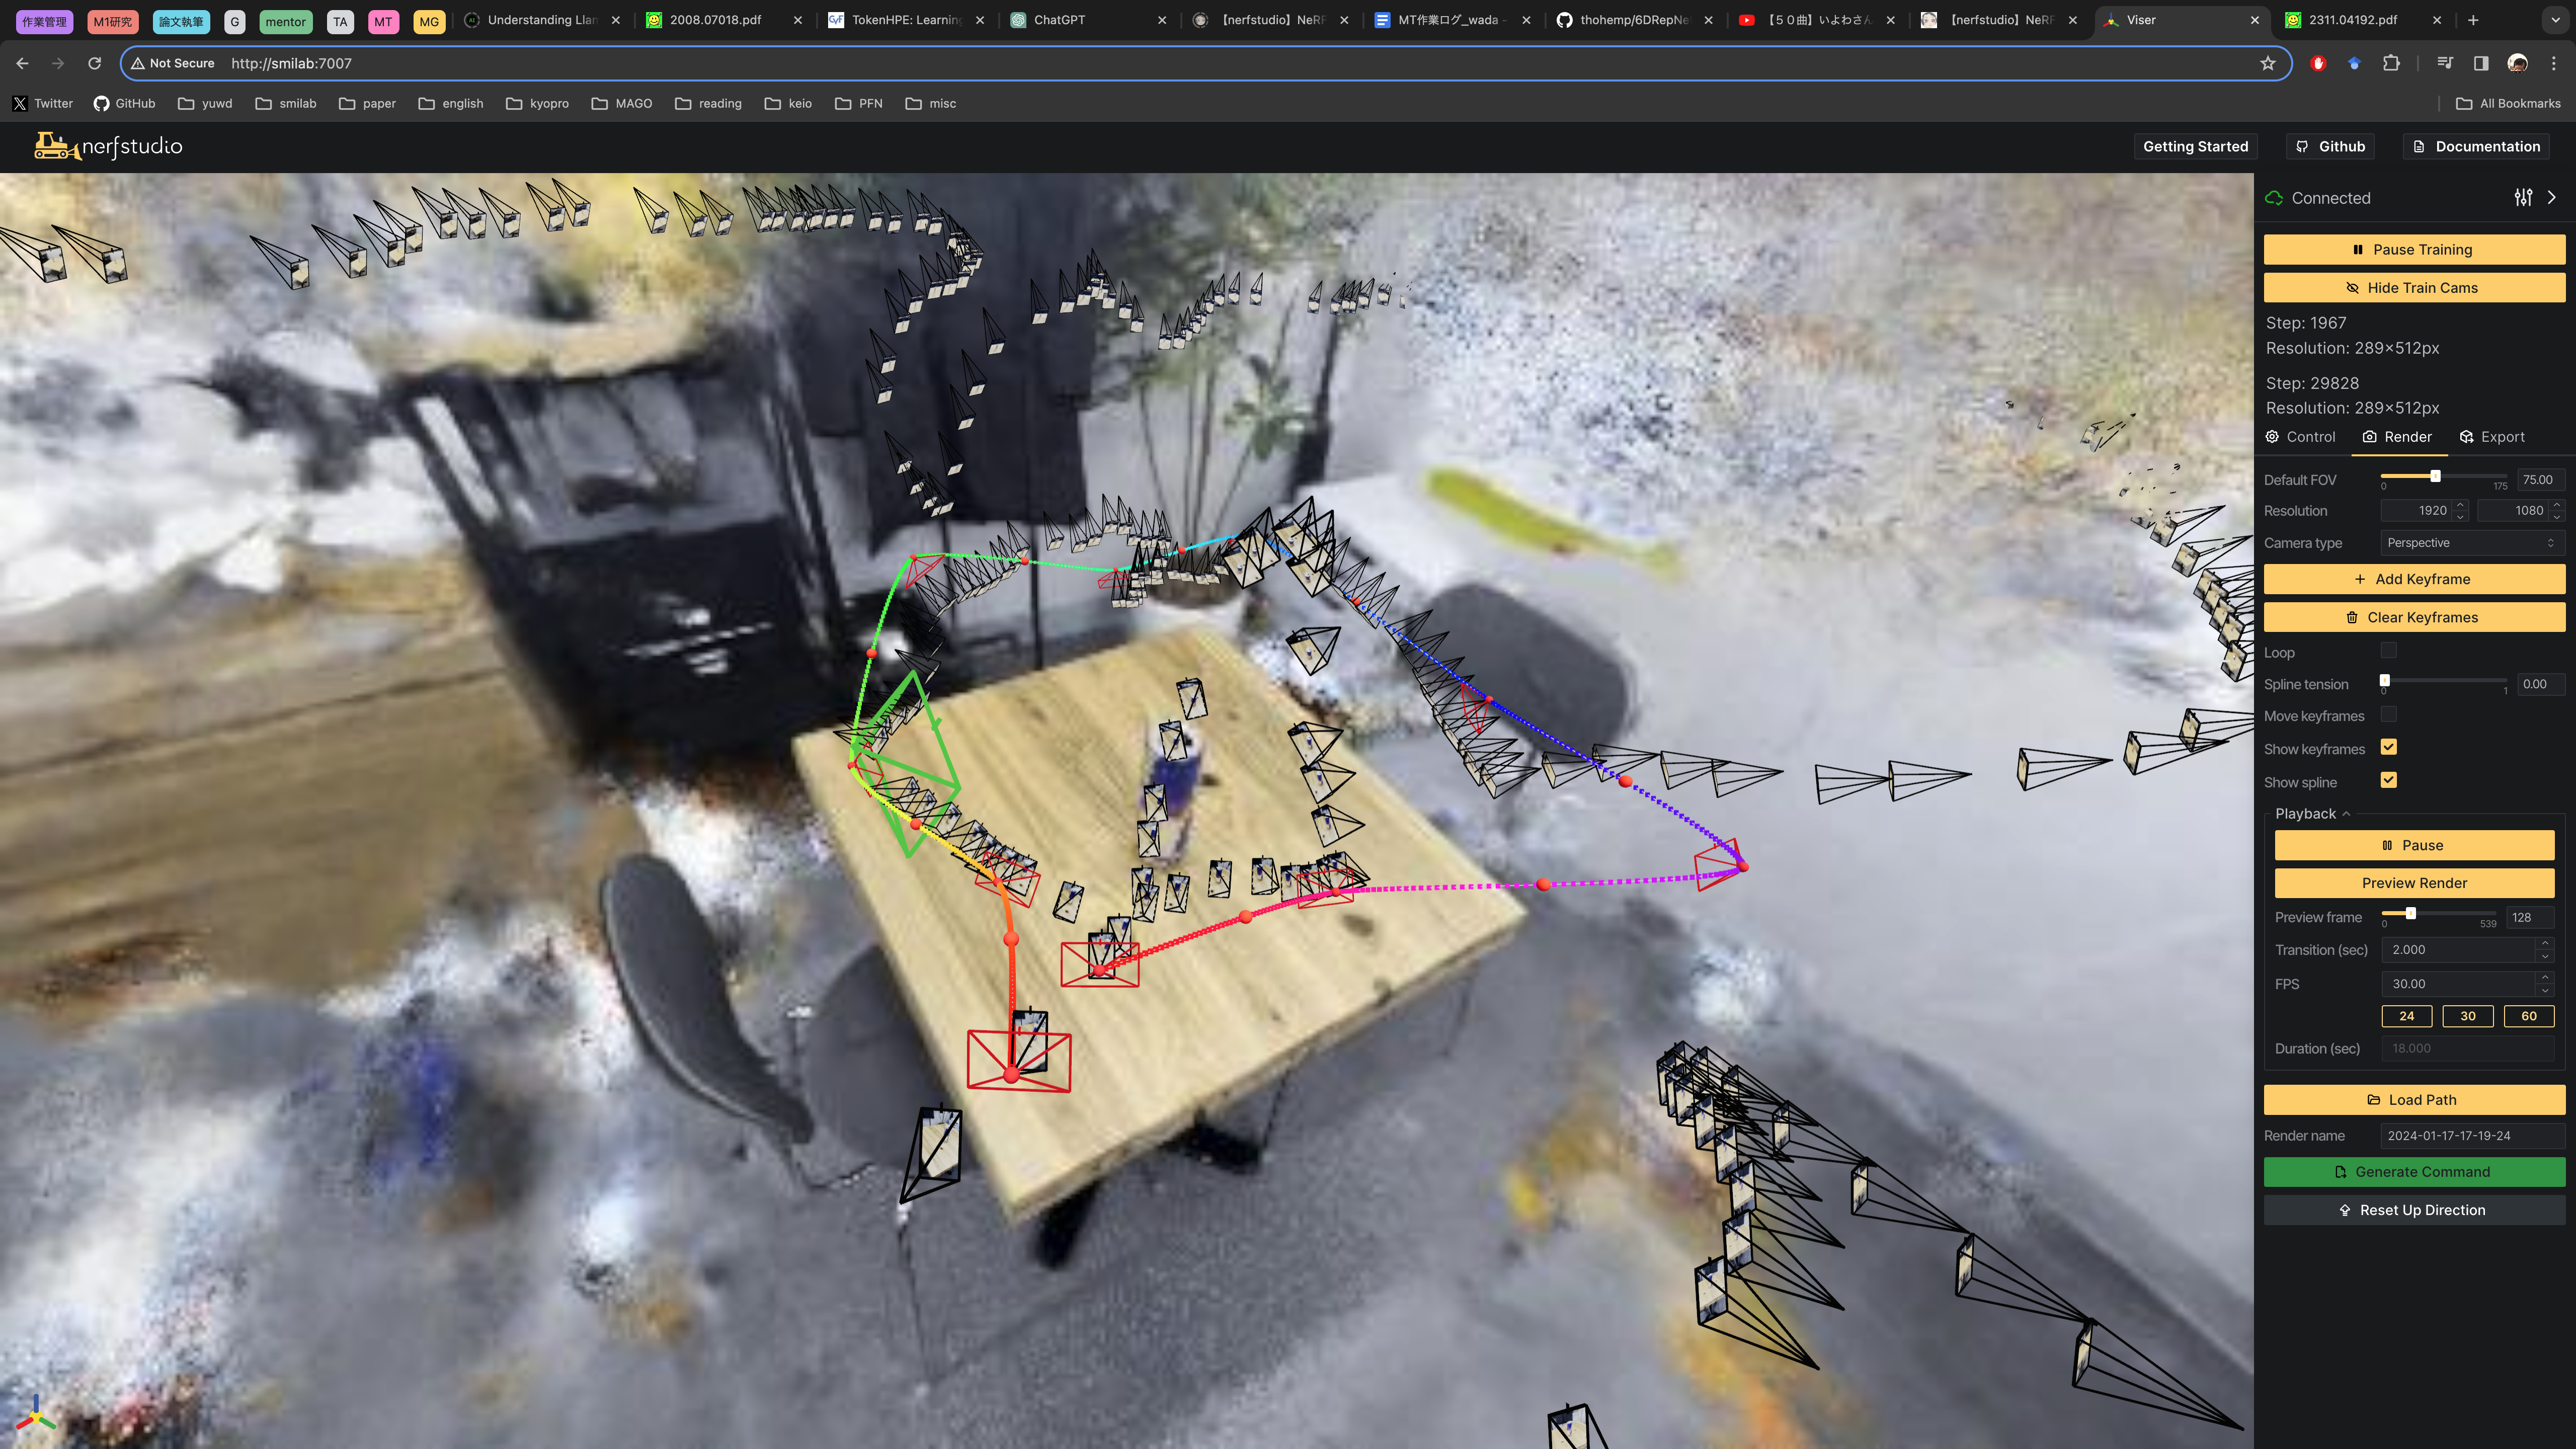
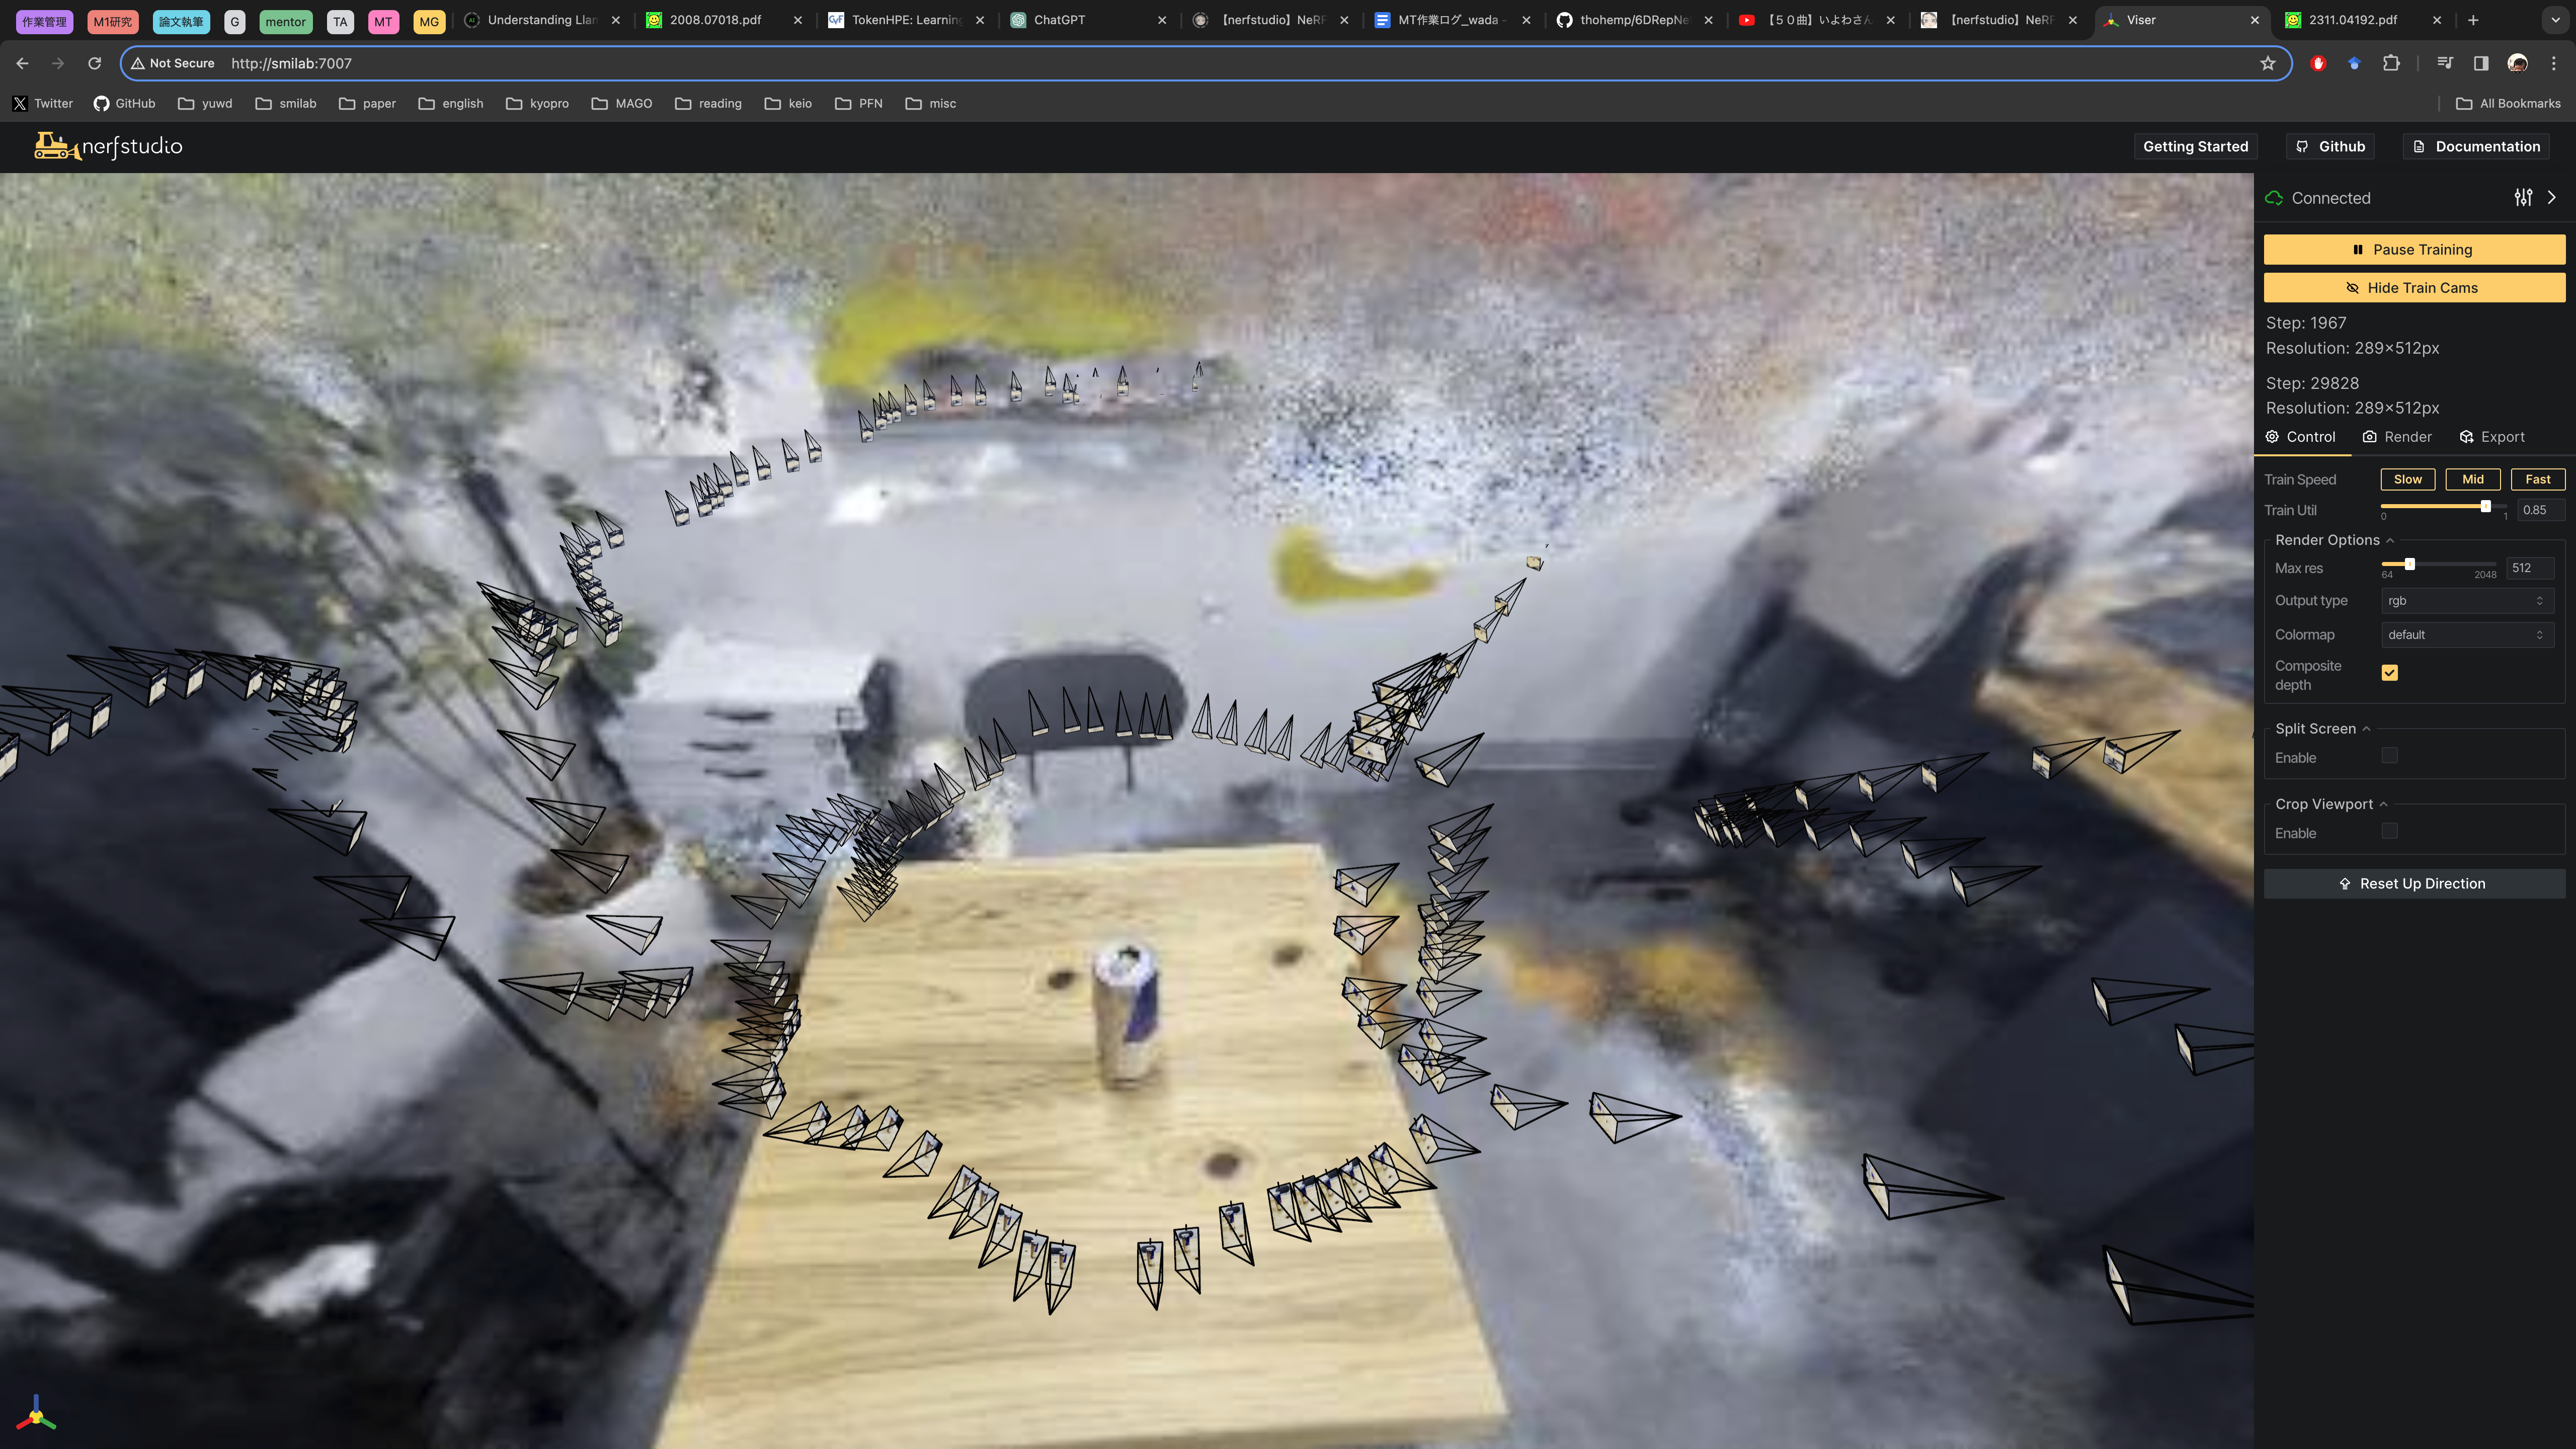
step3: 結果
- SfMにより位置が推定されたカメラ画像と,指定した視点においてボリュームレンダリングされた画像が描画される
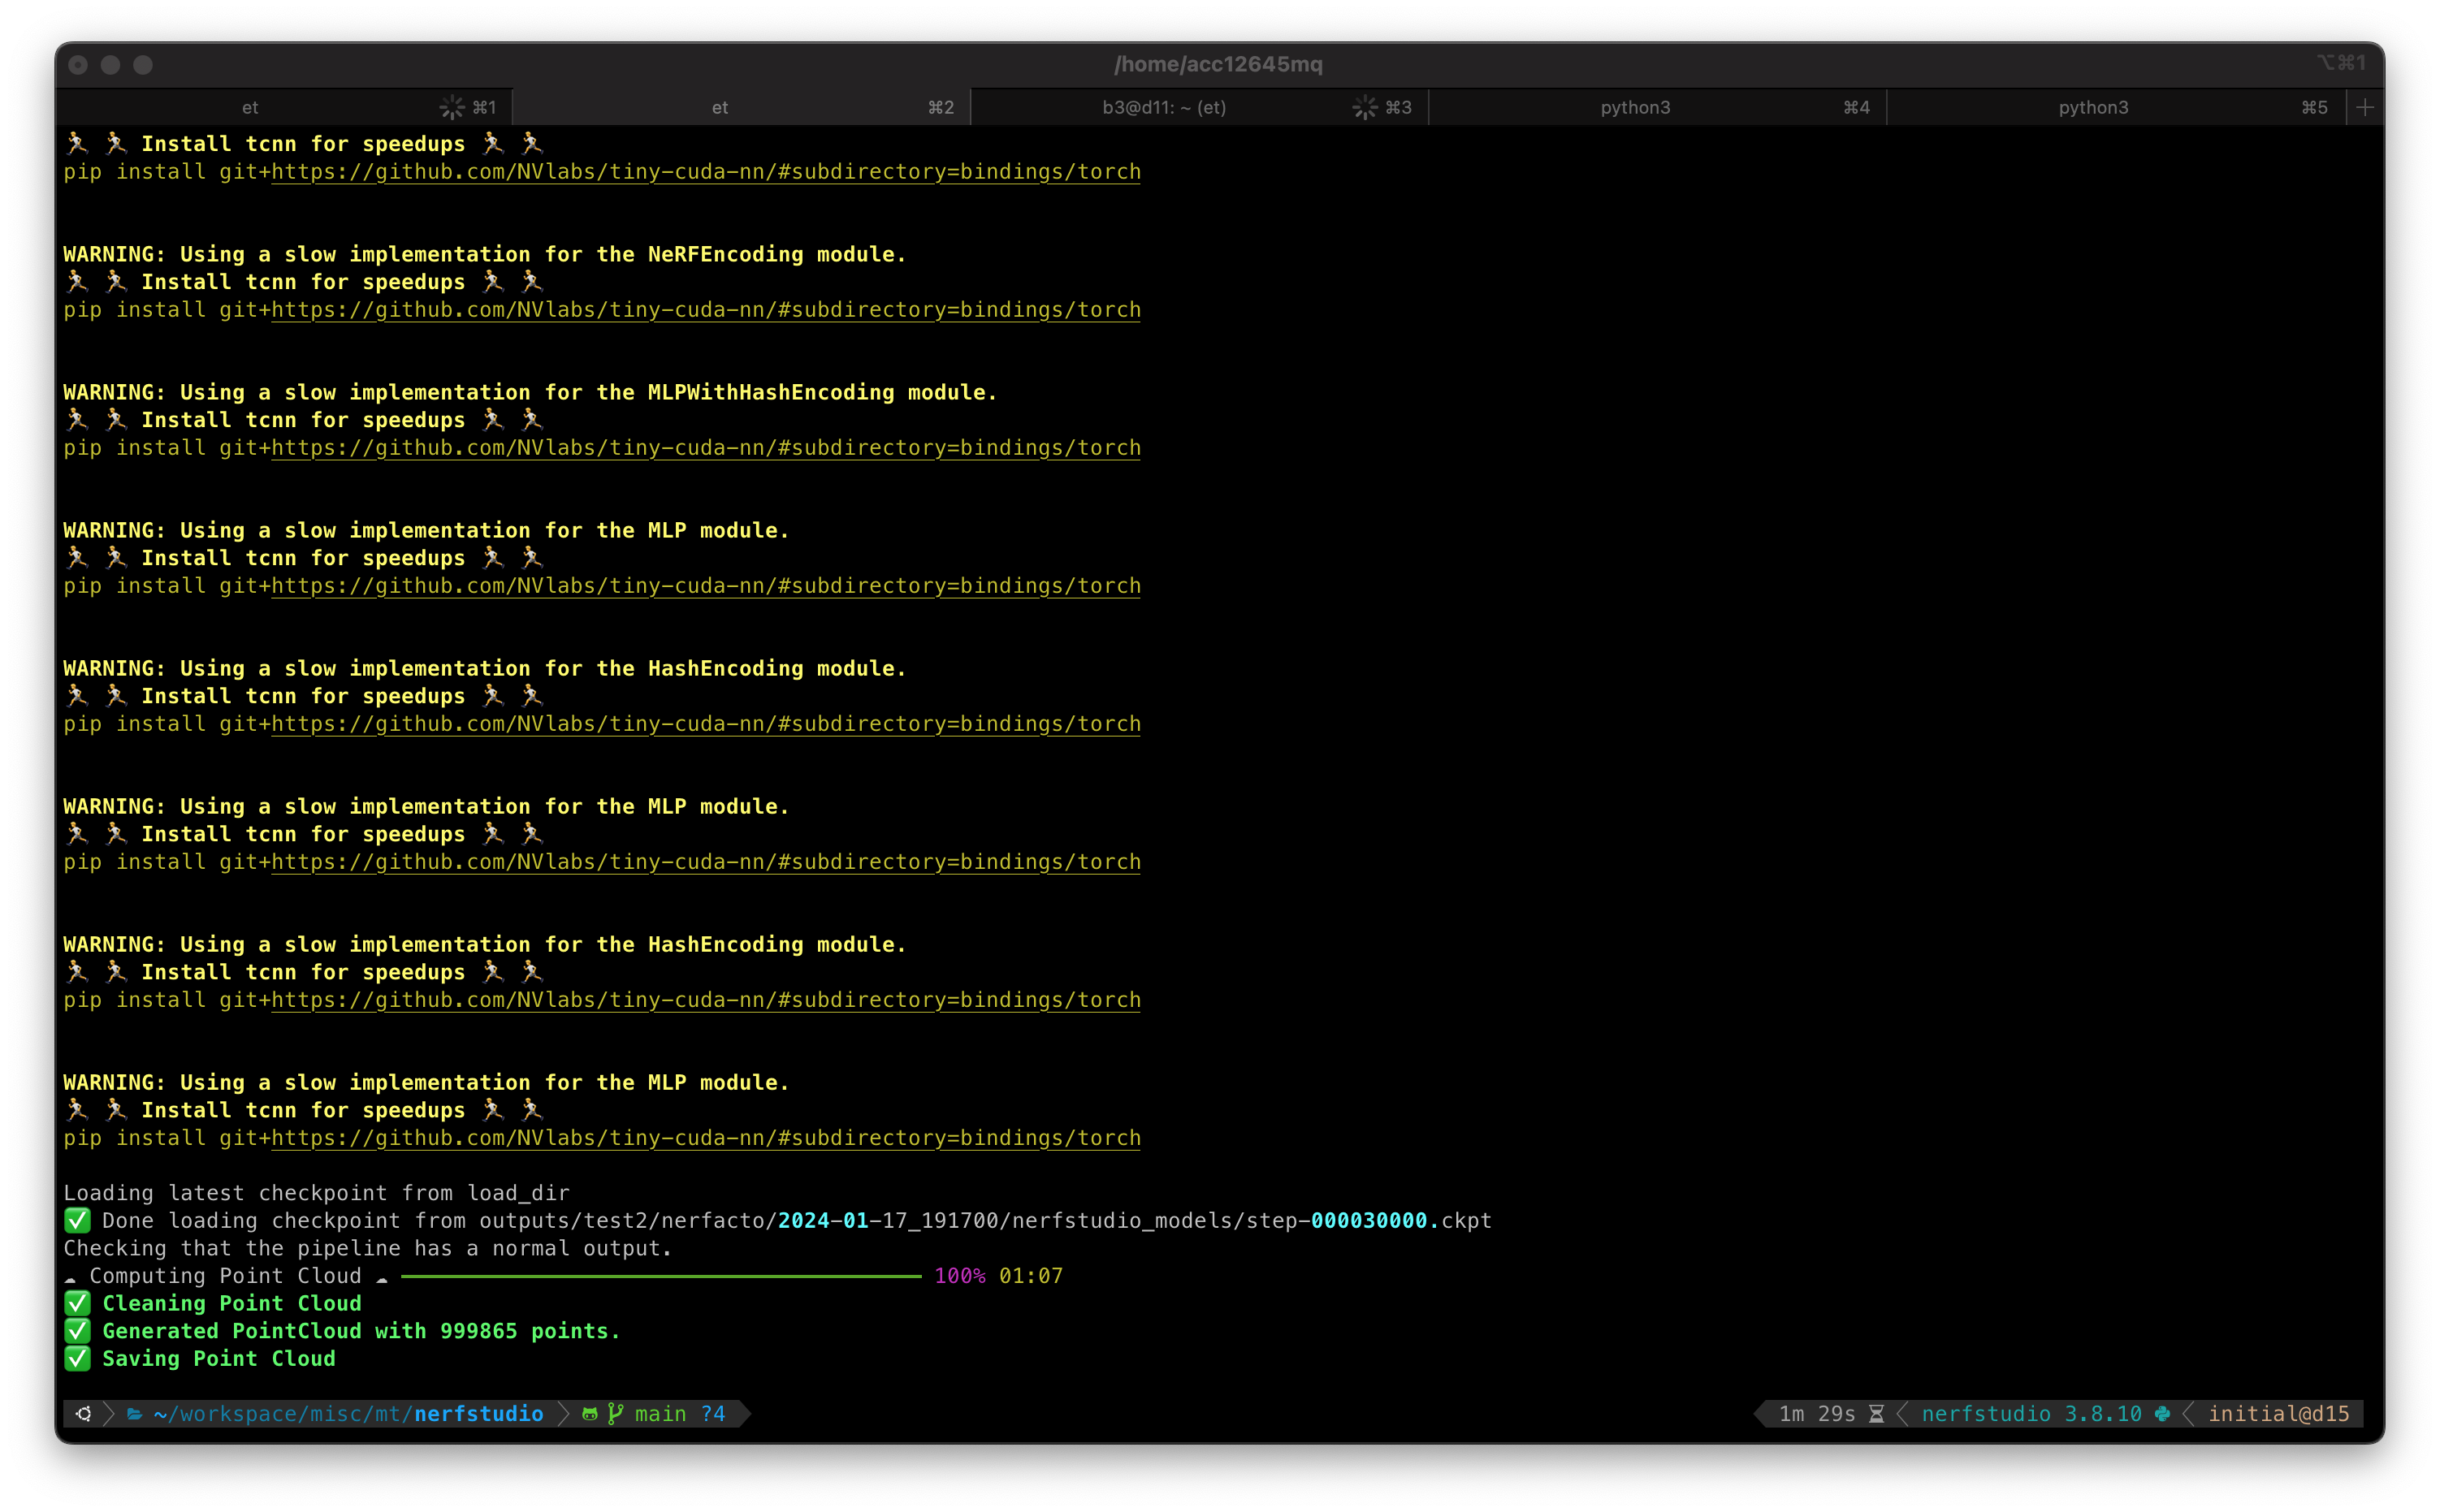
step4: 点群の抽出
|
|
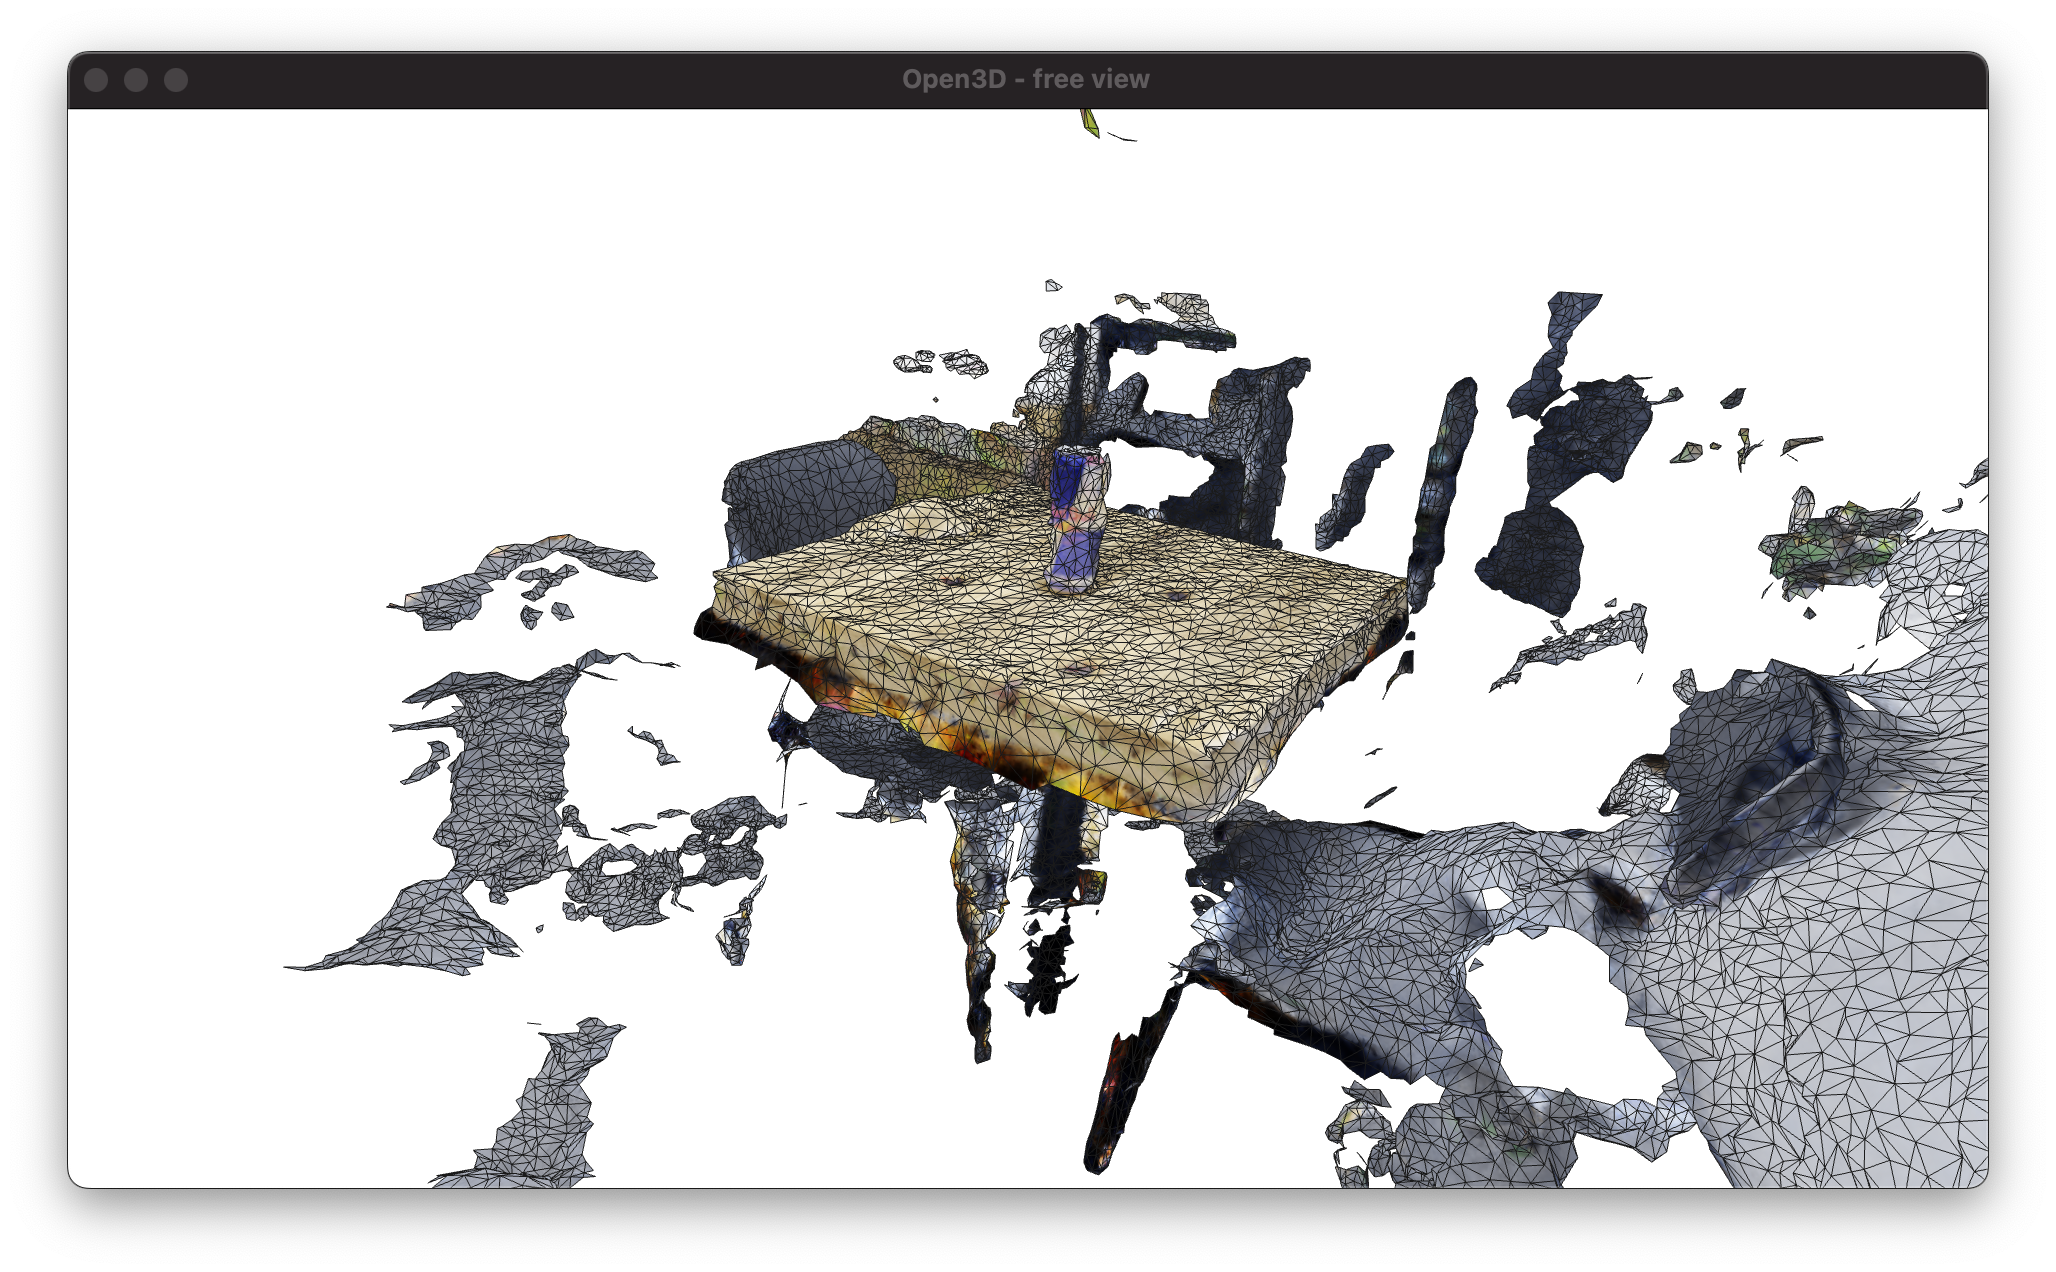
step5: メッシュの作成
|
|
- 復習
- 通常,
objファイルには表面の特性を記述したmtlファイルと,テクスチャ情報のpngファイルへの参照を保持している - そのため,
mtlとテクスチャのpngがファイル直下にあれば,普通にobjファイルを読み込むだけで,テクスチャも読み込んでくれる - 描画用コードは後述
- 通常,
step6: resume
- 以下のコマンドで学習途中のモデルを再度学習させることができる
|
|
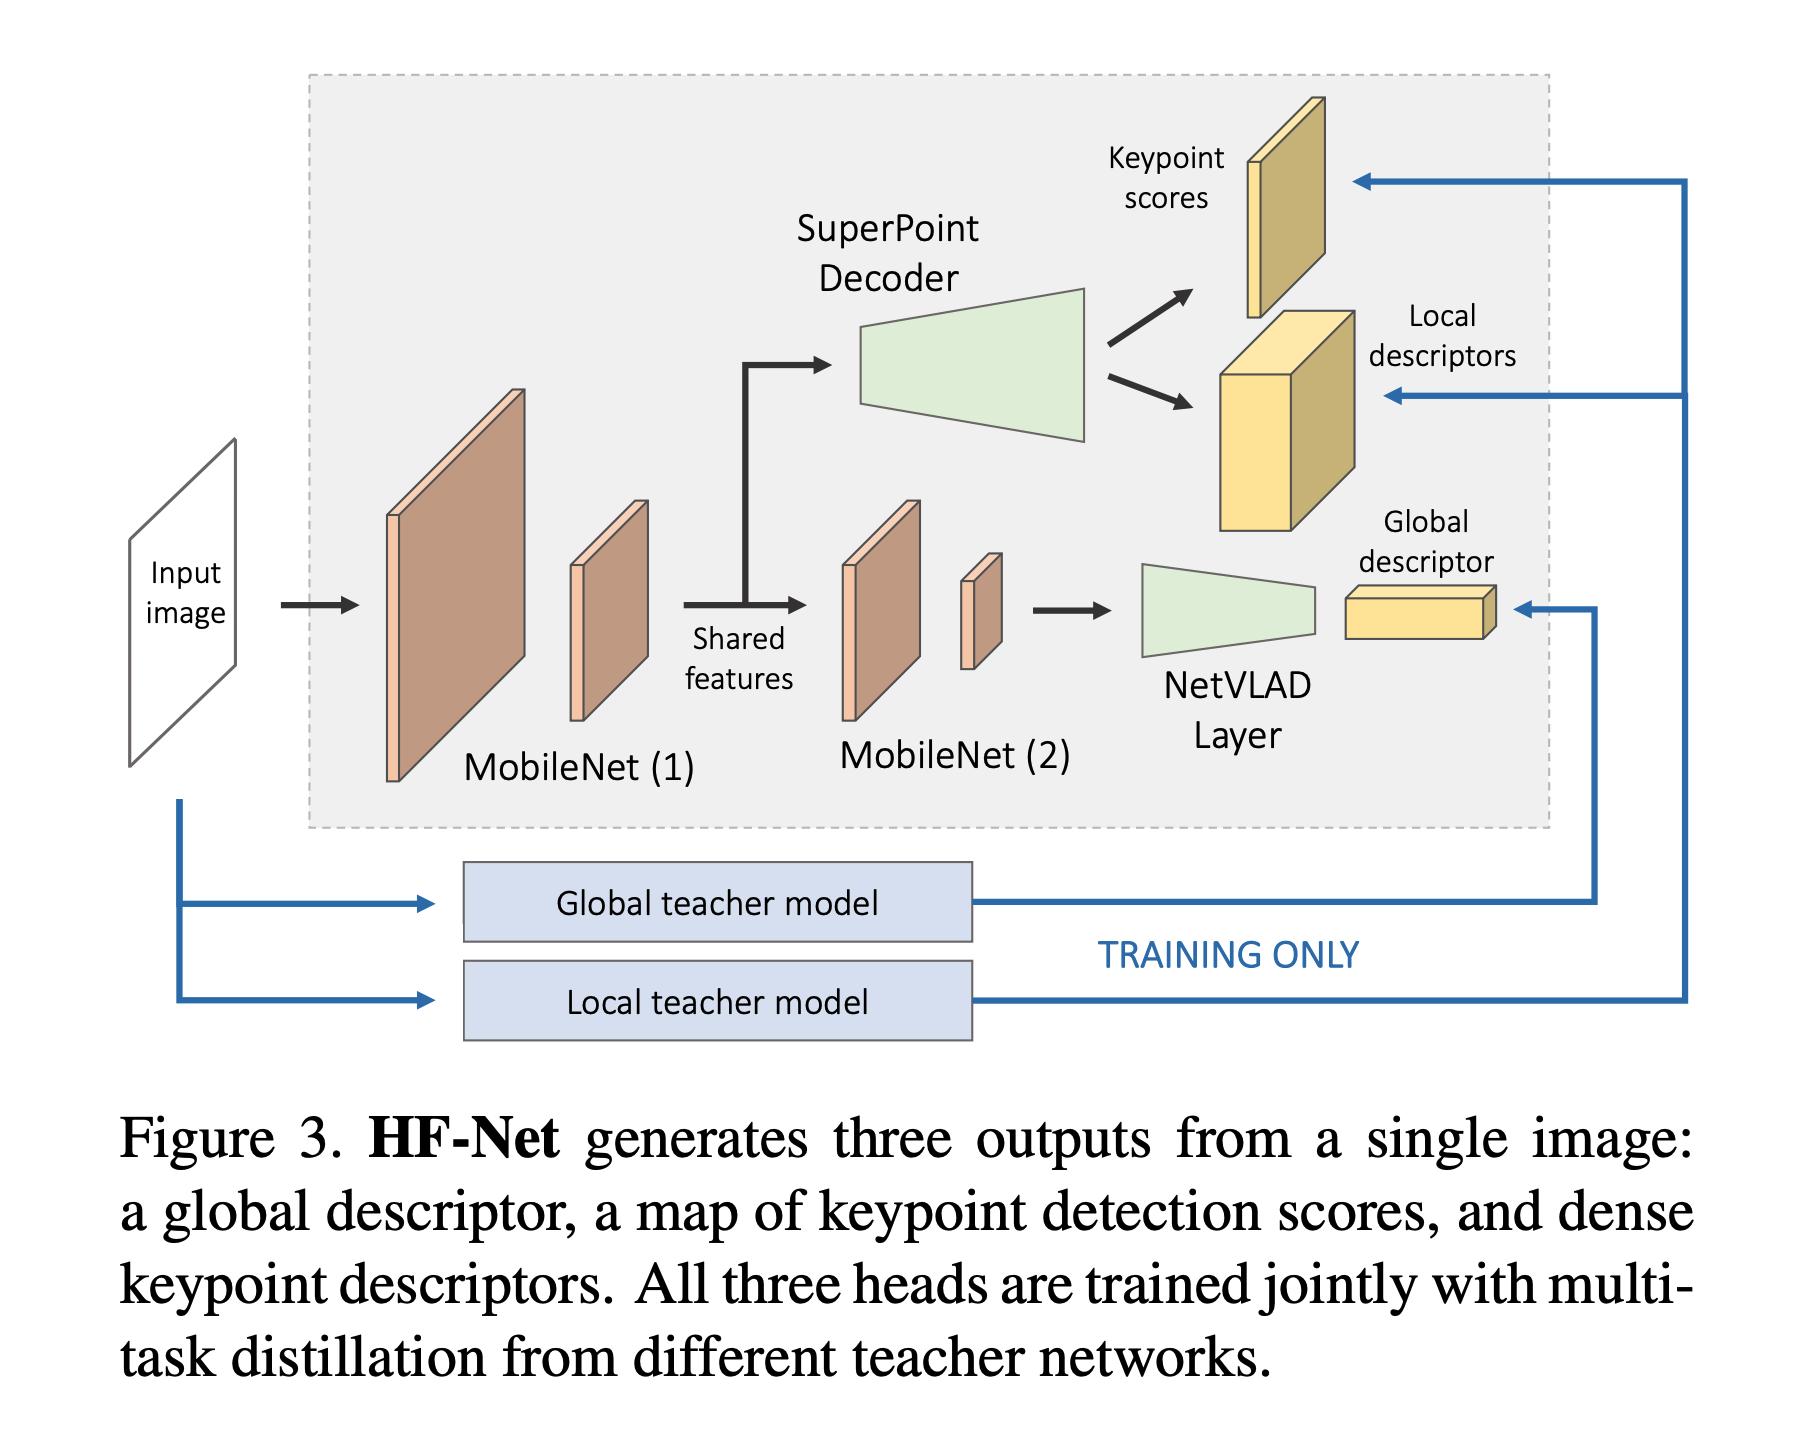
(optional) COLMAP以外の選択肢: Hierarchical-Localization
hloc- https://github.com/cvg/Hierarchical-Localization
- From Coarse to Fine: Robust Hierarchical Localization at Large Scaleの実装
- COLMAPよりも現代的な技術に基づく.
- MobileNetをベースとしたNNにより構成.
|
|
(optional) 描画用コード
|
|